Overview Of Shore #
Shore is a flexible and also complex data management application. The entire application is web based and all a user needs to use it is a browser. IWA collects limited personal information (first & last name, company, and email address) because it relates to the user accounts. However corporate data such as files, folders, and forms is made available to other Shore users based on security settings set by administrative users.
Terms such as click, click and drag, etc. are used frequently in this manual as it is written from the perspective of using Shore on a laptop or desktop computer. These actions on a mobile device are subtly different:
Left Click => Tap
Left Click & Drag => Tap & drag
Right Click => Tap & Hold
After reading this guide the user will know how to effectively navigate and confidently use all Shore has to offer.
Creating An Account/Signing In #
To create an account the user must access the database homepage at Shore. Navigate the pointer to the top right corner of the screen and left click the Sign In button. The user must then left click the Request Account option which will take them to a new screen.
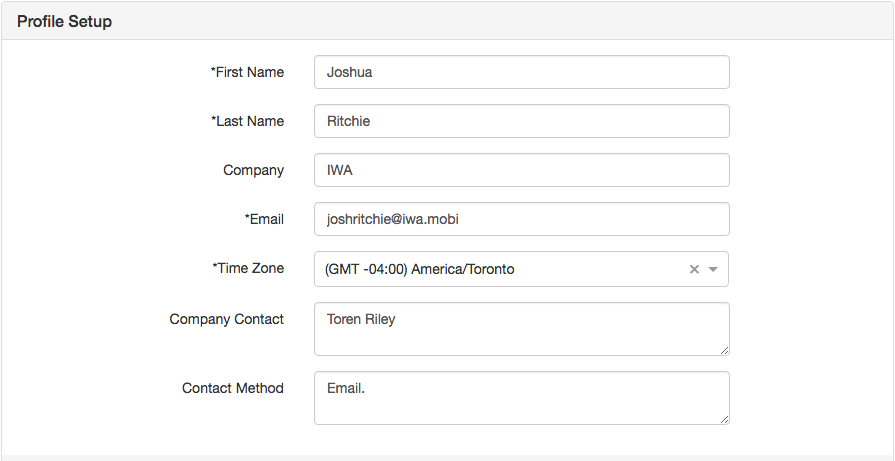
The user then enters his/her information. The fields with a star must be completed before the request will be submitted. They must enter a first name, last name, email address, and a time zone. The other fields can be left blank if so desired.
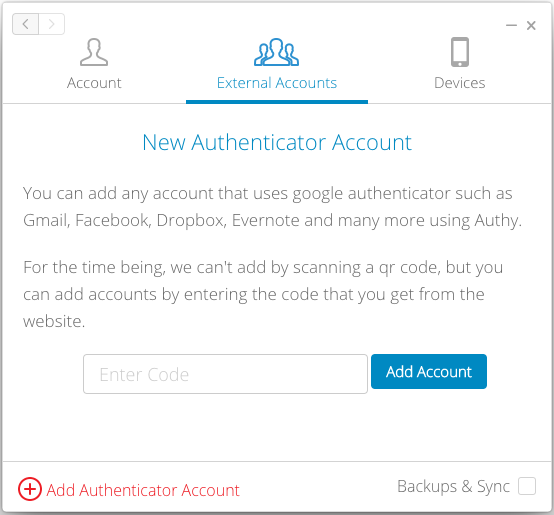
A two step verification is needed to complete the set-up using an authentication app such as Authy or Google Authenticator. This authentication application boosts security giving each user a unique token that changes every 30 seconds. Install one of those two to the device. Below is the Authy application.
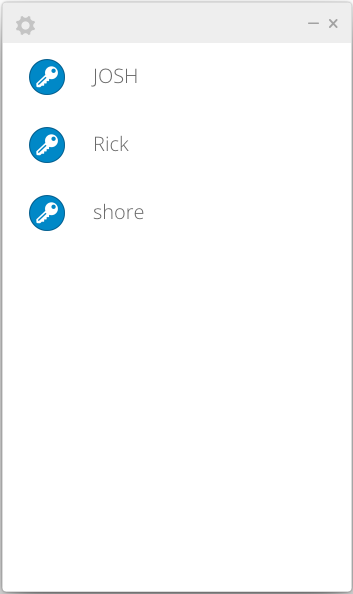
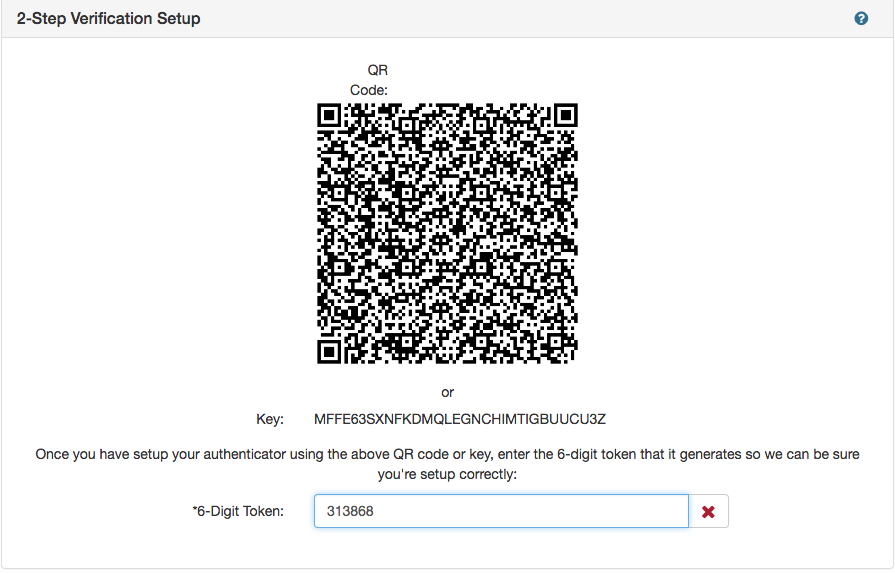
They will have to enter the key (ex. MFFE63SXNFKDMQLEGNCHIMTIGBUUCU3Z) into the authentication app.
The user can scan the QR code if they are using a device with that functionality. The user takes the six digit code that is returned and input it in the 6 digit Token field. Make sure to read the disclaimer BEFORE hitting the request account button
The account signed up for needs to be added by a user with the permissions to do so. This requires an administrator to access the User Permissions section of the Admin Console.
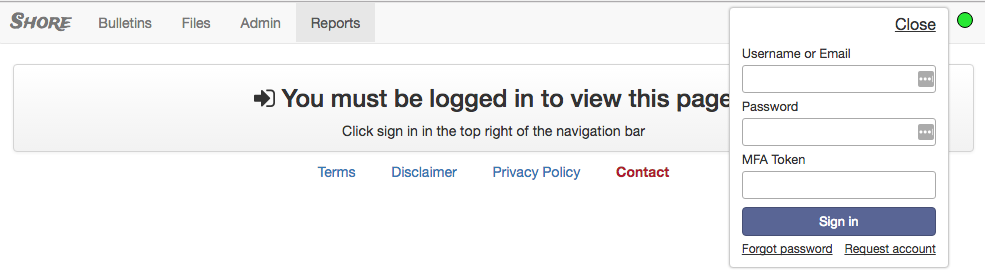
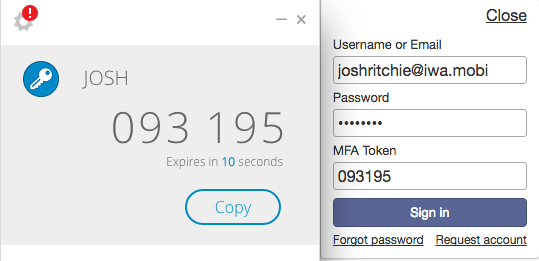
Once the account has been approved or if an account was already created, the user just needs to go to the home database page of Shore. Left click the sign in option on the top right of the page. Enter the user name/E-Mail, password, and then Open the Authentication app to get the MFA token.
If the user can not access the Authy application because a new device or lost password, please contact the administrator.
When signed in the user will see a box that pops up to tell them they are connected to the server. This can also be checked by the small circular button in the top right of the page.
Notification Settings #
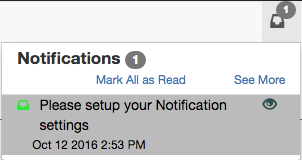
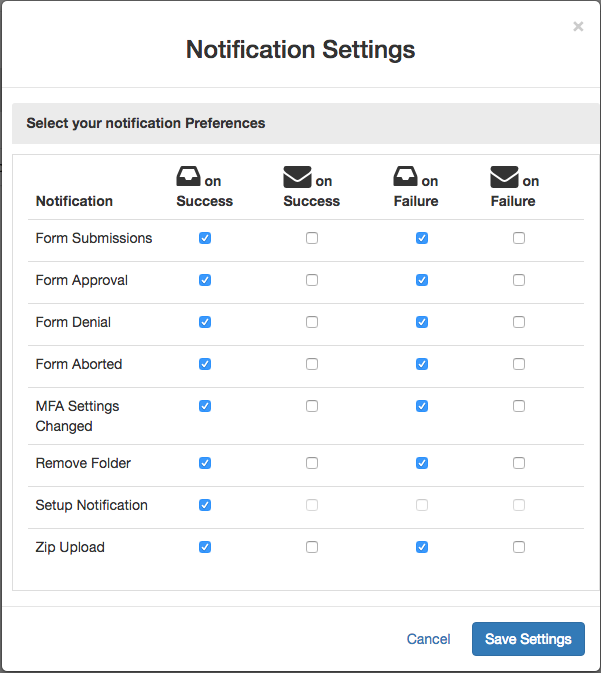
Once signed in for the first time Shore will send the user a message into their notification inbox asking to set up their notification settings.
Notifications in Shore tell the user when a change has occurred. Users can decide between a notification in the Shore Application, an email to the users e-mail address, or to not receive any conformation. The settings below are the default ones already selected with every account.
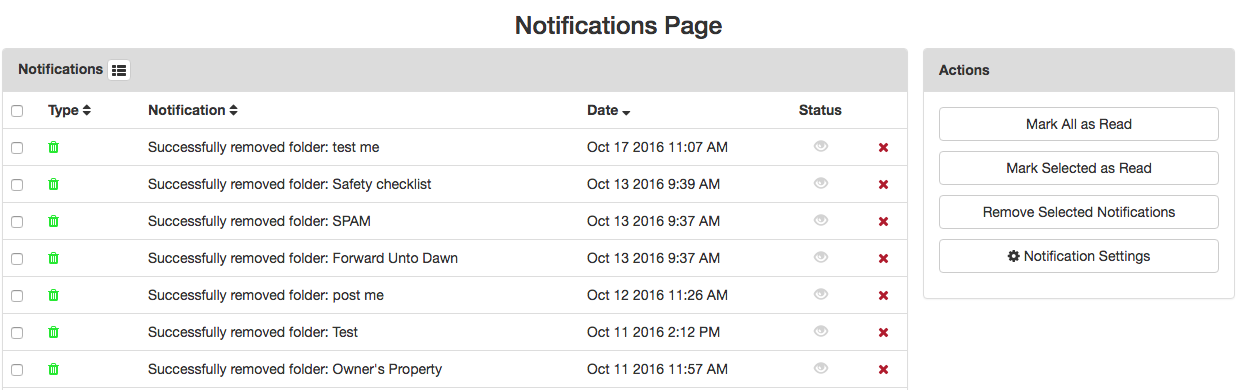
The see more button in the notification inbox allows the user to see a page of their notifications.
The notifications can be sorted in the table by left clicking on the Type, Notification, or Date category (Ascending/Descending). They can also be sorted by the different types of notifications by left clicking the menu button beside the “Notifications” title.
They can be toggled from read to un-read or vice versa by left clicking the status button beside each notification.
Users can check the boxes on the left hand side of a notification and remove them by left clicking on the “Remove Selected Notifications” button in the “Actions” box.
The settings can be changed at anytime by selecting the Notification Settings button.
Profile #
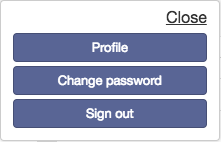
When signed in to access the users profile navigate the mouse to the upper right hand side of the page. Left click on the drop down menu on the users email address. Select “Profile”.
On the profile page the name, company, email, and time zone of the user may be edited. To edit the fields just left-click on the pencil symbol and change the field to what you desire. To save the changes just hit enter.
The profile page will also show all groups if any the user is a part of.
Users can log out all other devices that are using their account.
The reset MFA token will reset your authentication settings in case the user can not remember how to access their authentication application information. Reset MFA will send a request to the site admin and they will reset it for the user. This is a similar circumstance if the user has lost or forgotten their authentication sign-in information.

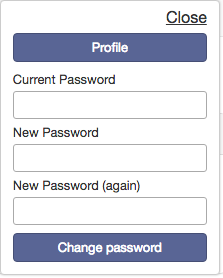
Users can change their password easily by navigating the mouse to the top right corner where their email is located and left clicking on the drop down menu. Select the “Change Password” option and type in a new password.
Users should make sure to use the sign-out option in the drop down menu after they are done with their session.
Footer Menu #
The footer menu contains links that lead the user to understanding the responsibilities and conditions for using SHORE. This also contains an area where the user can add contacts.
Terms #
The Terms section gives users the terms and condition guidelines for agreeing to use the SHORE application. Terms and conditions should be read before using the website.
* On a side note the user should always read terms and conditions when signing up to any service.*
Disclaimer #
The disclaimer delimits the company’s responsibility and obligations for the user’s use of the database.
Privacy Policy #
The privacy policy discloses the ways IWA collects and uses the user’s information. This can include personal information to corporate information used within the application.
Contact #
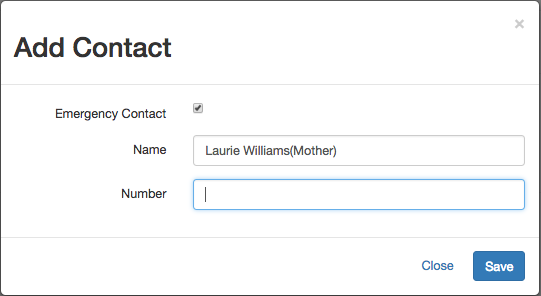
Contact includes the phone number and support email address to get in touch with IWA and its employees. The user can also add custom contacts with a name and number. These can be an emergency contact or just a contact the user needs to remember.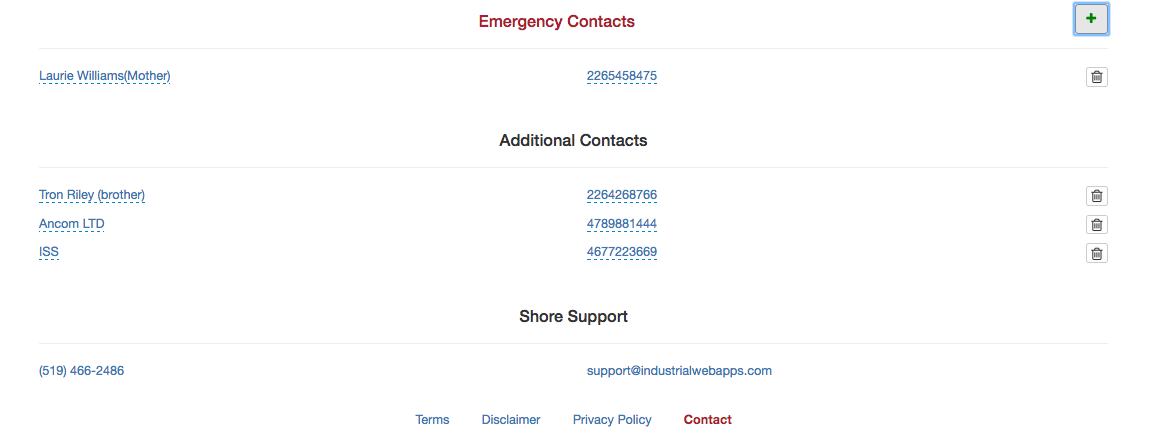
Basic Database Navigation #
At the top of the Shore Application is four main tab options.
The top right corner houses the user’s notifications, their sign in email, and an icon that shows the server connection. (Green means you are connected, yellow means that the server connection is trying to be established, and red means no connection)
Creating Files/Folders #
Find the Files tab along the top menu bar

The files page contains three panels: left, centre, and right. Each panel can be resized by left clicking & dragging on the boundaries between them. The panels can also be quickly hidden by hitting the push pin button.

The left panel contains a collapsible and expandable tree structure. Left clicking on a folder will expand or collapse it. If the user right clicks they can modify the folder or its contents.
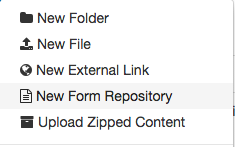
Most of the options are pretty straight forward like creating a New Form Repository, Copy Properties, and Delete.
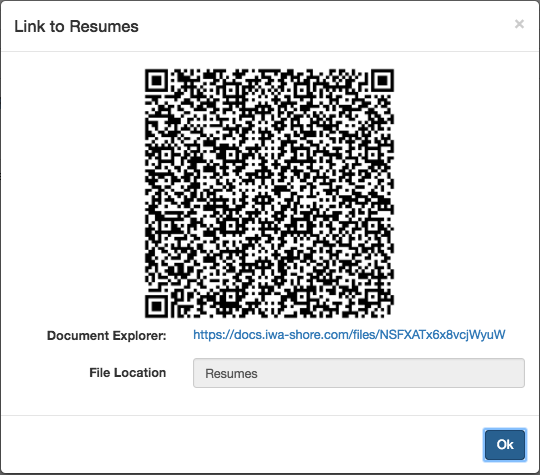
Link to this Document creates a unique URL for the specific folder.
A subordinate folder can be added to the parent folder by highlighting the first folder made and right clicking on it. Choose the new folder option to create a subordinate folder. The subordinate folders are always indented from a master folder.
Bulletin Posts is the name of the parent folder
Bulletin Support is one of the subordinate folders

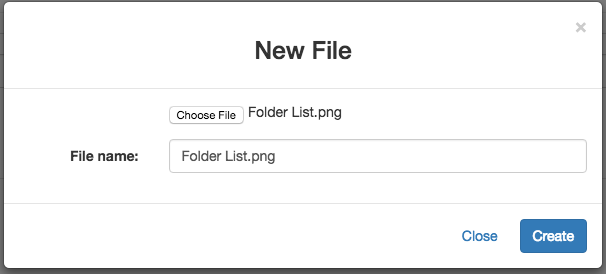
Creating a new file is done similar to adding a new folder. The user just right clicks on the new folder and selects New File. The user then decides on a file from their machine.
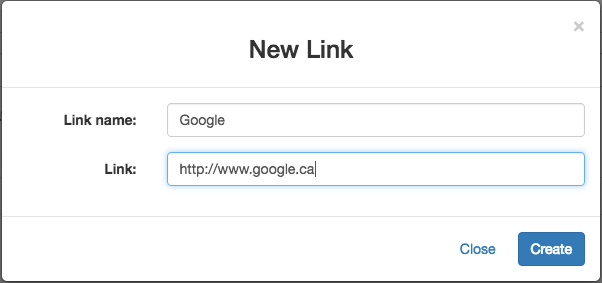
The user may link a website in any folder or in the database using a hyperlink. Right click on the common slash/folder and choose the New External Link button.
A form repository may also be added to the database. More information in this link => Repositories.
The centre panel shows the contents of the folder that is selected in the left panel. Double left clicking a file will cause it to download. The centre also contains the search bar. Files and folders can be dragged and dropped into different repositories and sections of the database. When uploading a file into a folder from a mobile device you can capture pictures and videos right off the device camera. 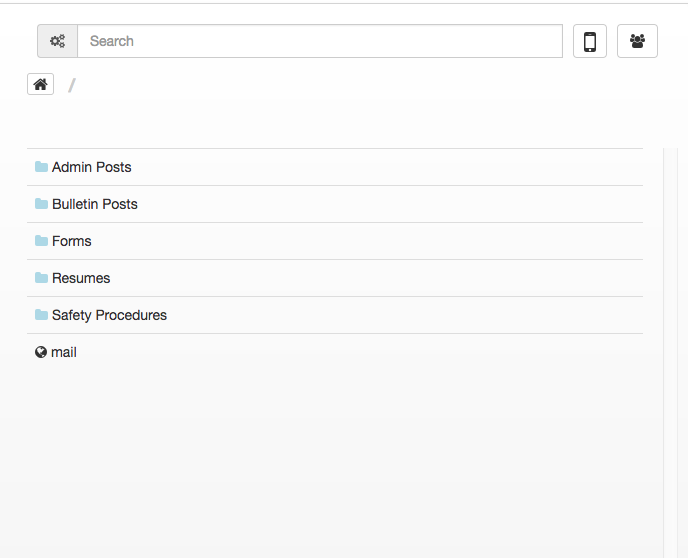
Right clicking on the files or folders allows users to modify the contents.
A form repository has different modifying options then the rest. The user can perform a bulk upload which allows the user to upload several forms to the repository. They can also bulk fill out the entries which allows fields to filled out en-masse.
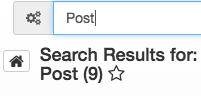
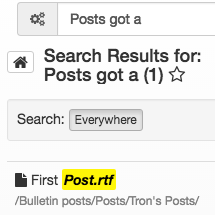
The search is a great way to locate information the user are looking for within the database. The search works similar to search engines like Bing or Google. Just type some keywords into the search box and hit enter.
The search bar contains an advanced search option where the user searches with multiple or singular words/phrases to locate the file/folder. The user may also choose words to exclude and if a file is found with those it does not get returned by the search.
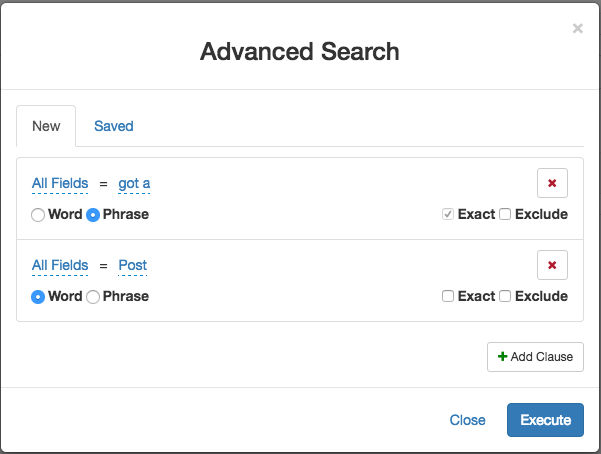
After the advanced search only the specific file(s) are returned to the user. If the user wants to save the search for another time they just hit the star beside the search name. The user is asked to name the saved search. This allows the user quick access for the next time the user searches for those parameters.
For a quick way to get back to the top of the database tree or to clear the search easier, use the home button beside the name of the parent folder.
At the end of the search bar there are two buttons. 
The button with the mobile phone icon is for switching from desktop to mobile view.
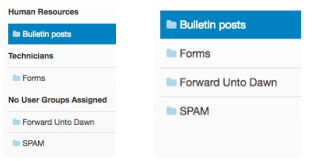
The second button allows the user to sort the files and folders into their respective groups. Groups are a great way to isolate users into specific categories or projects (ex. Human Resources and Technicians).
* On a side note the user will be disconnected from the server when they select a different tab within the browser or if they remain inactive for 60 seconds. The connection will be re-established almost instantly.*
Properties and Relationships #
The right panel displays the properties of whatever was last clicked on and highlighted in the left or centre pane. This gives users a bit of information without leaving the main database page.
System Properties are for the most part decided by the software although, some of them are configured by the user. User Properties are added and edited manually.
**Configure properties in Administration Console.**
System Properties #
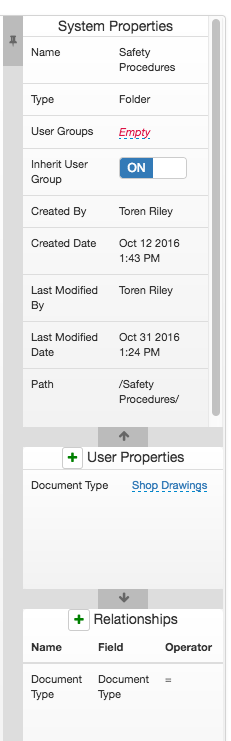
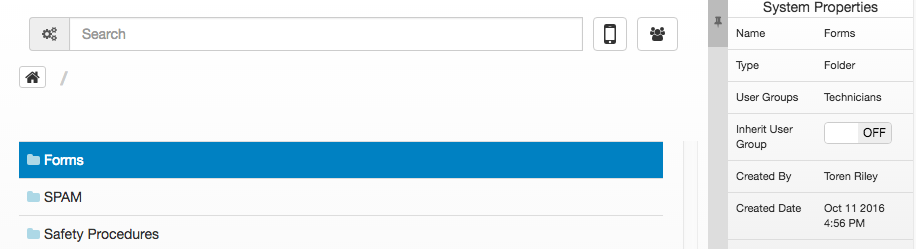
System Properties gives the users a basic understanding of the file in question. Telling the user some minor details like the type of file, when it was created, and when it was last modified. Different types of files can have different types of properties associated with it. An example is a folder will not show a “word count” or “file size” but the document inside the folder does show those.
User groups is left empty until the user determines what group the file should be in. If the file/folder has a group selected the user must be a part of that group to see the contents.
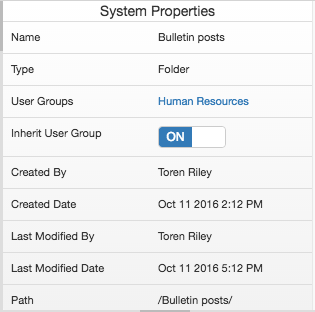
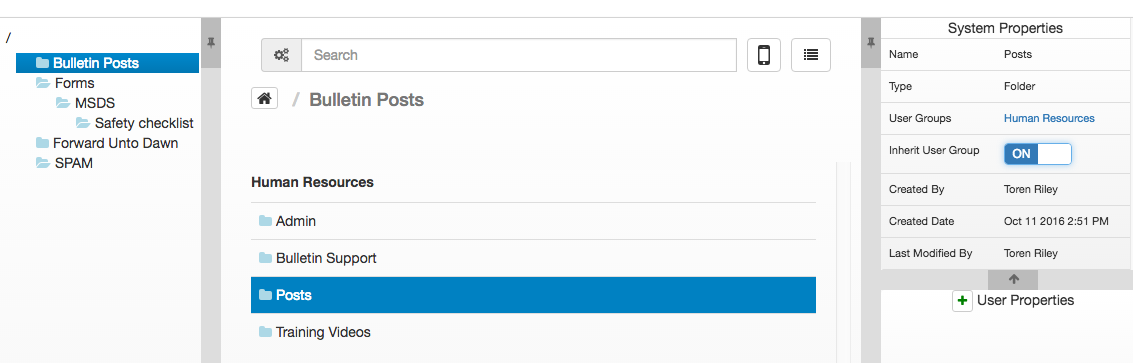
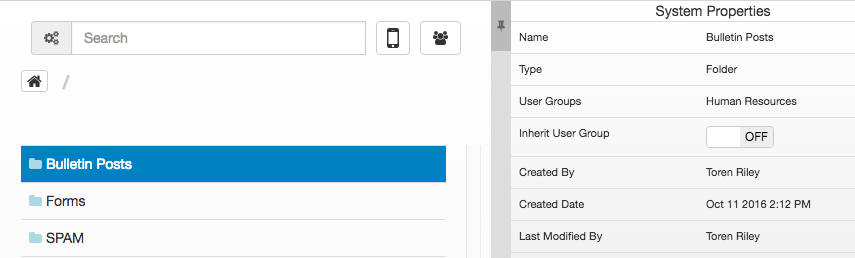
The user can see “Bulletin Posts” because they are a part of the group “Human Resources”. However if the user was removed from the group, “Bulletin Posts” would no longer be visible.
In the case that Inherit User Groups is switched on and a parent folder has a group set to “Human Resources”. When the user creates a new subordinate folder, the child folder will then inherit the group of the parent.
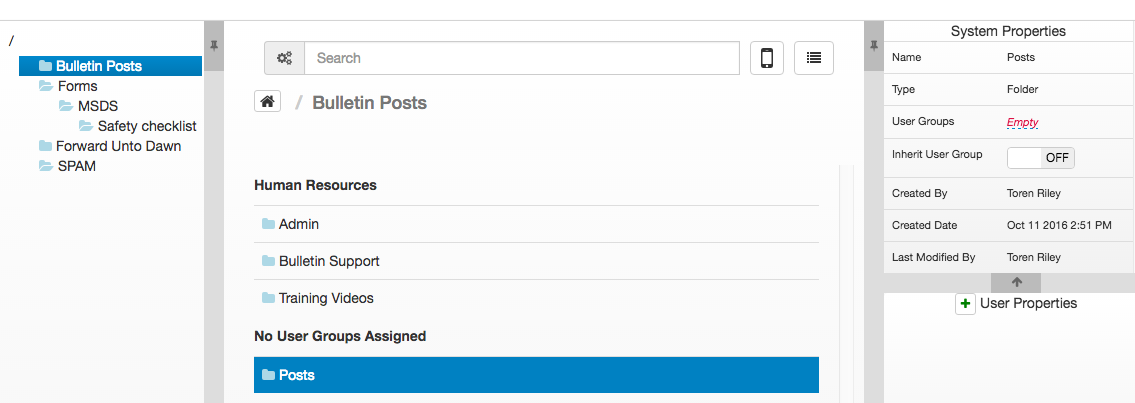
However if the user switches the subordinate folder off of Inherit User Group and remove the user group the subordinate folder is no longer in “Human Resources”. This can be modified at any point.
Form Repository System Properties #
System properties with form repositories adds a few more options. These system properties are set manually by the user.
Fields Shown- Allows users to decide what fields are shown by default when entering the form repository.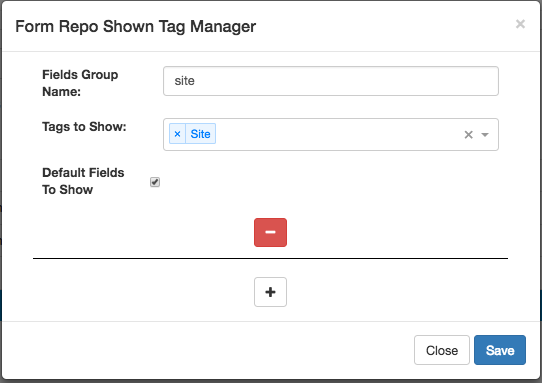
Form Approvers- Allows users to select what groups have authority to approve the submission of a form within a repository.
If no group is selected any user with permissions on the database can approve the form.
One approver can be required. The approver does not have to be a part of all the groups chosen. Any number of groups can be chosen to approve the forms.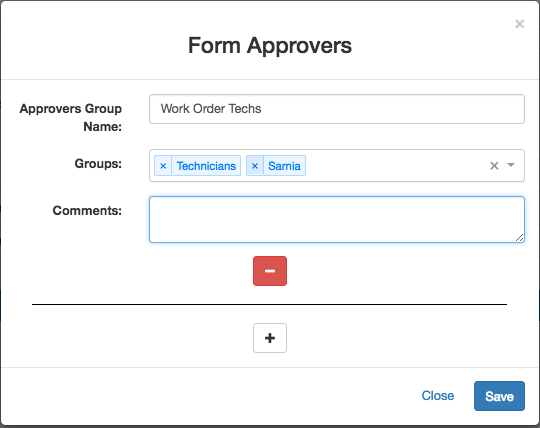
Multiple approvers can be required. This requires the user to get approval from each group and the users must be unique.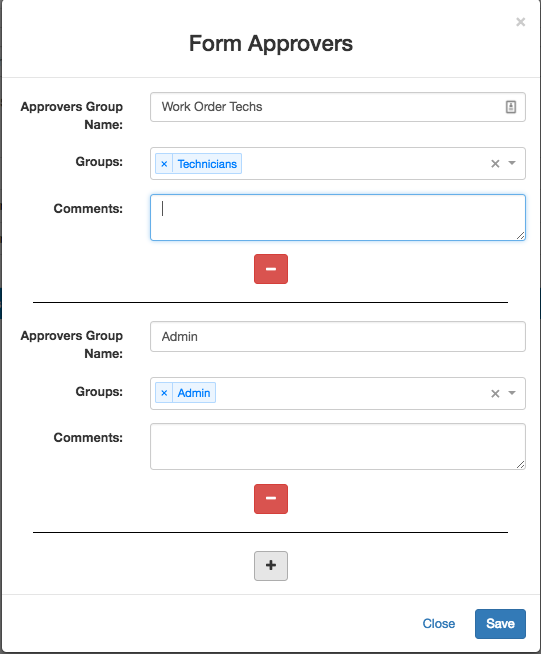
Notify On Submission- The user decides when a form is submitted who gets notified if anyone.
Shared With- Allows users of a particular group to allow other groups access to their forms with or without editing access.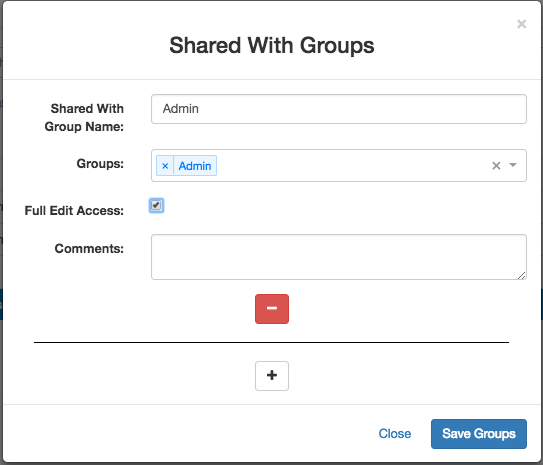
User Properties #
User properties can be changed at any time by a user with permissions to do so. Super Users can add or remove user property types in the admin console.

Document Number labels the file or folder with a unique identifier that increments by one for every file labeled.

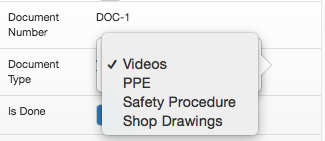
Document type allows the user to add a label to define what kind of file or folder the user is dealing within the database. A drop down list appears when the user left clicks on the Document Type field to choose from. The list can be changed from the admin console with proper permissions.
Is Done is a feature that lets the user mark folder or file as completed (On=True, Off=False).

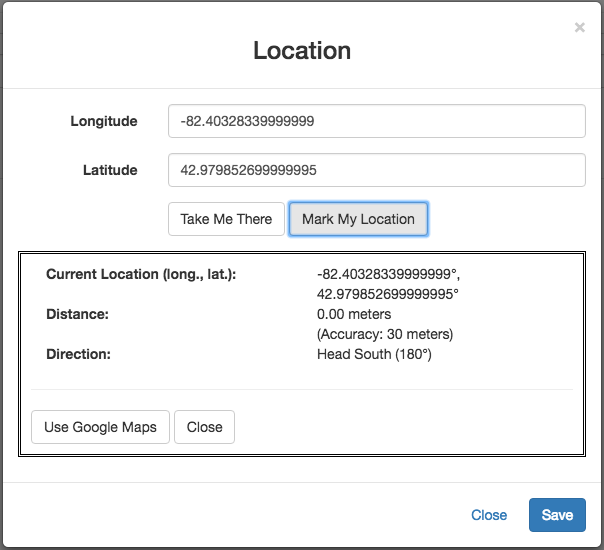
Location gives the user GPS co-ordinates of where the user want the file or folder to be linked to. It can be used with location technology or a location can be manually chosen from google maps.
Owner is the name of a user or company in charge of the file/folder.

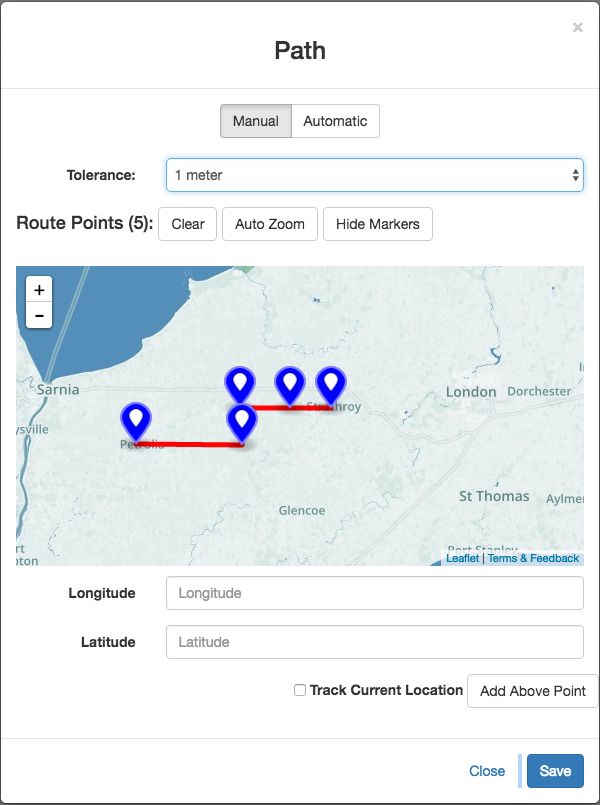
Path is shown on a map with several points of reference. It allows the user to plot a route with the mouse or by knowing the GPS co-ordinates. Path also has a setting to change the distance the user can veer off the given course called “Tolerance”.
Relationships #
**Configure relationships in Administration Console**
Relationships are a great way to link files/folders to each other within Shore. Any object that is being shown as a relationship has a green coloured icon beside it.
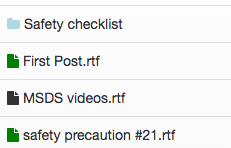
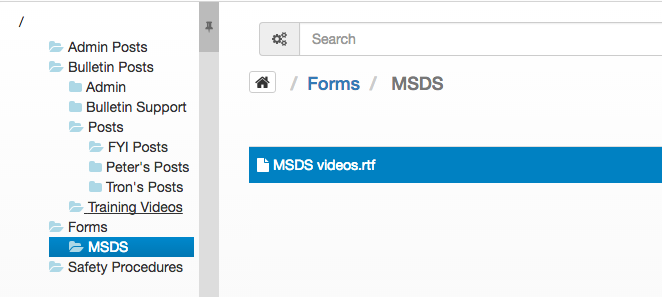
In the example below the user would like to make a relationship between the folder “Training Videos” and the file “MSDS videos”.
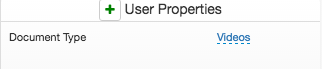
Using the Document Type User Property the user added the tag “Videos” to the “Training Videos” folder to define it.
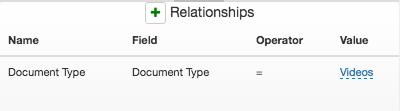
The user then locates the “MSDS” folder and left clicks the “MSDS videos” file. On the relationship panel on the right hand side the user left clicks and add a Document Type relationship from the drop down menu select “Videos”.
The “Training Videos” folder now shows the “MSDS videos” file from within it. This gives the user a quick way to access the “MSDS videos”. The relationship does not go both ways as the user can’t see “Training Videos” from the “MSDS” folder.

The folder where the user wants the relationship files to be found uses the user property panel to define it. The file that will be shown in that folder uses the relationship panel on the right hand side to make a connection.

Form Repositories #
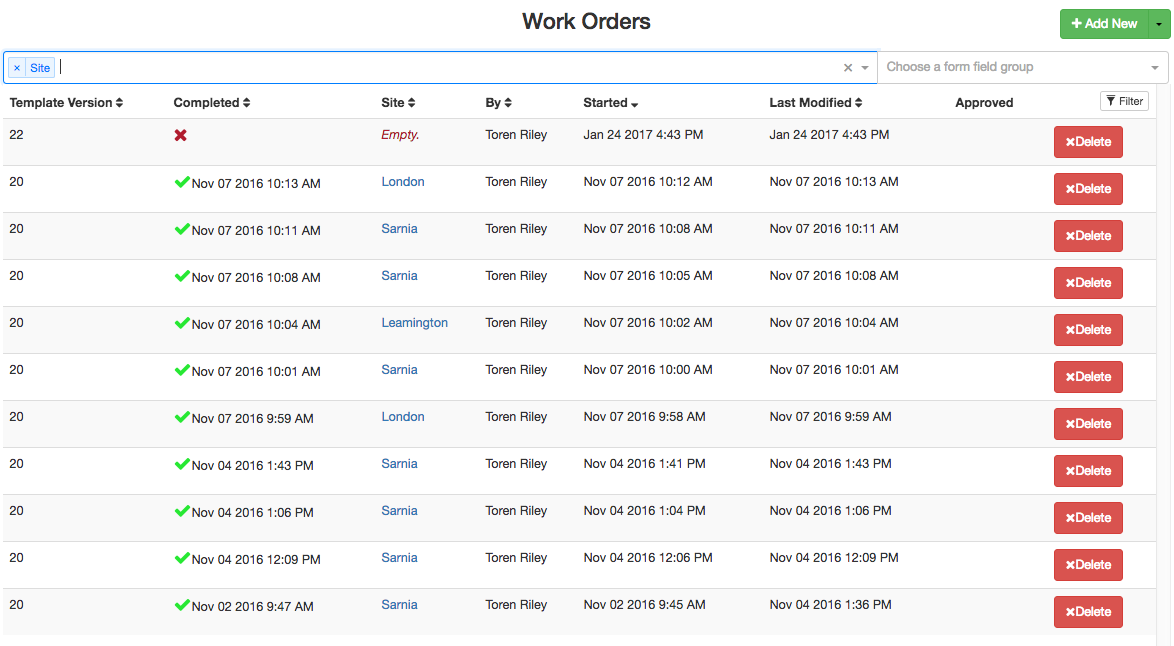
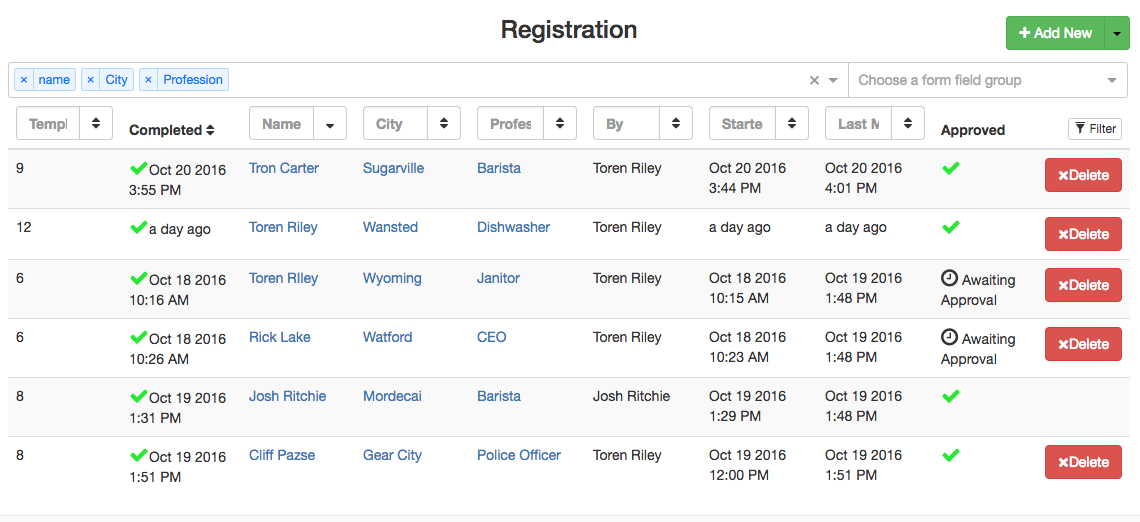
Form repositories can be added as long as a form template is on the database and published. To add a repository to the database just right click on a folder or on the common slash line. Form repositories allow users to create a database of a form. It can be completed any amount of times and by any number of people as long as they have access. To enter the repository just double left click the file. More information on forms templates and form creation is available in the Form section.
Fields can be added to the top search bar to show details of every form created in that repository. The fields for incomplete forms can be changed from here without actually entering the form. The user must be the one who created the form to change it. The filter button on the right hand side can also be used to sort order of the forms. Users can sort by each new field that is added to the search bar at the top.
Filling Out Forms #
To add a new form to fill out and send into the database just left click the new form button. The user will be sent to a new page where the blank form is located. Data is saved almost immediately after it is entered into the form. Near the top right corner is a message that indicates when the data was last saved.

Form Data Types #
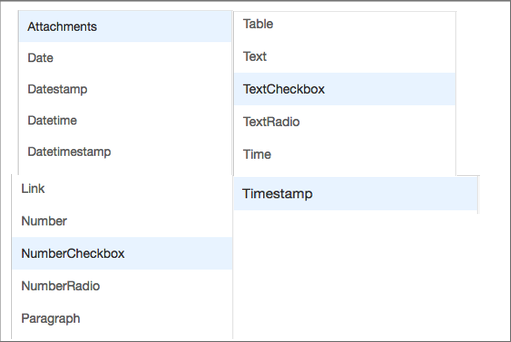
Forms have many different Data types to input into the fields they relate to.
Attachments- Allows pictures or files to be attached.
Boolean- Has only two possible values: True or False.
Date- Users choose a date from a calendar.
Date Stamp- Program Stamps current date on form.
Date Time- Users can implement a date and a time they select.
Date Time Stamp- Program stamps current date and time.
Dynamic Reference- Allows the repository to reference another repository.
Image- Users can upload an image to the form.
Link- Link allows the user to enter a URL and domain.
Number- Allows a user to choose a numerical value.
Number Check Box- Gives users a multiple choice list with number boxes. Users may choose to check more than one.
Number Radio- Gives users a numbered list with radio circles where only one can be chosen.
Paragraph- Allows for a detailed text box.
Table- Creates a table that the user can modify to add more rows or columns and fields. Table must be added in Excel Template.
Text- Users input text relating to the field.
Text Check Box- Gives users a multiple choice list with text boxes. Users may choose to check more than one.
Text Radio- Users have a list of text options with radial circles to choose one.
Time- Users select a time of day.
Time Stamp- Program Stamps current time to field.
Form Validation Types #
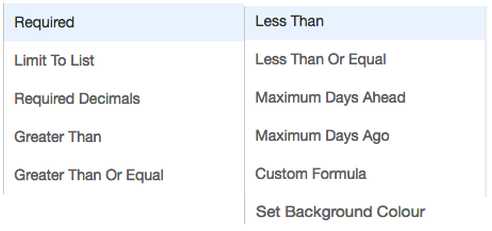
Forms Also have validations that must be met. Validations use a calculations to determine whether the information the user provided is valid for the field or not.
Custom Formula- Users make their own validation formula. All formulas begin with a “=” sign.
Greater Than- Users set a number that the field must be greater than.
Greater Than Or Equal- Users set a number that the field must be greater than or equal to that number.
Less Than- Users set a number that the field must be less than.
Less Than Or Equal- Users set a number that the field must be less than or equal to that number.
Limit To List- Users can choose from a list of pre chosen options. An option for accepting user input besides the list can be allowed.
Lock Cell- Prevents the users ability to edit the cell.
Maximum Days Ago- Users can set a date so that it cannot be set over so many days behind todays day.
Maximum Days Ahead- Users can set a date so that it cannot be set over so many days ahead of todays day.
Multi List- Users can choose multiple options from a list. Option for adding user input can be allowed.
Required- User must complete the field. (Field background becomes Yellow)
Required Decimals- Proper amount of decimal places must be used to complete field.
Set Background Colour- Background of the field changes colour using a formula.
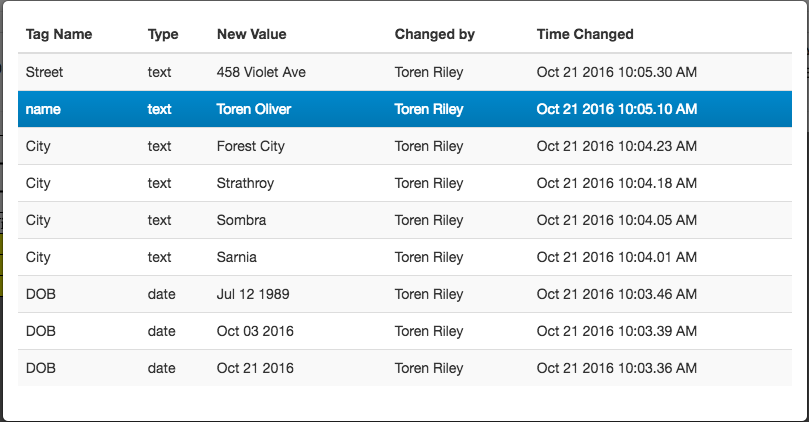
Forms can show the users history within each cell. This allows the user to see what was typed into the fields prior to what it is now. Any field with a blue hash box around it has had prior entries into the field.
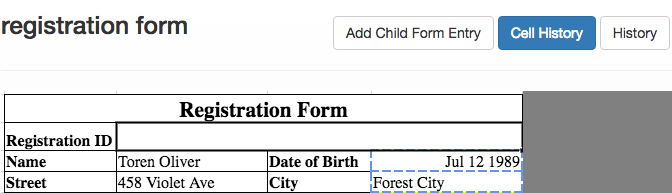

The user can also left click the History tab beside Cell History and they can see all of the fields present and past data values.
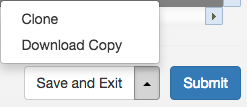
A form can be saved before completion, cloned, or a copy can be downloaded. Once the form has been filled out properly the submission button on the bottom right will become clickable.
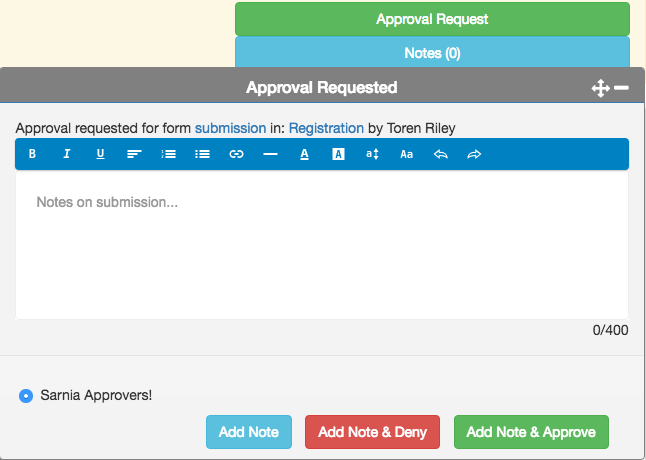
After the form is submitted it has to be approved by a user with the permission to do so. Only forms that are the latest version can be approved. Notes can be added to the submission when being approved. When forms are viewed at another time more notes can be added by left-clicking the notes button in the bottom left corner of the form viewer.
A super user can also take a form that has been approved previously and overwrite and deny the approval.
A user without “Super User” access may not delete an entry that is not their own. The name of the repository must be entered correctly to confirm deletion of a submission. The conformation is case sensitive.

Bulletins #
Bulletins can be accessed through the nav-bar at the top of the page.

The Bulletins section is essentially a public blog where many different things can be shared or posted. This makes information between groups or through the database easier to share between users.
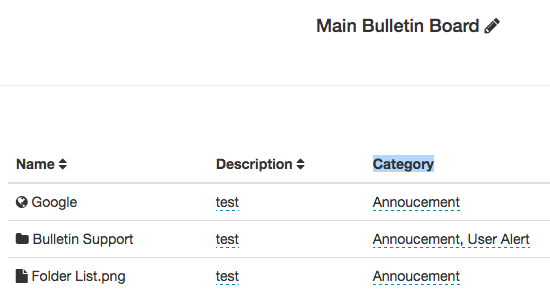
Main Bulletin Board #
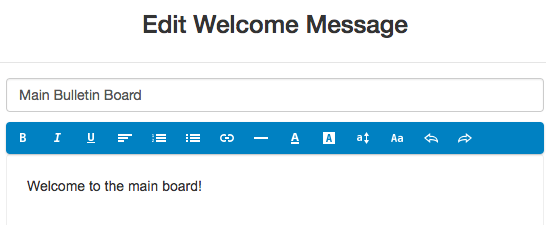
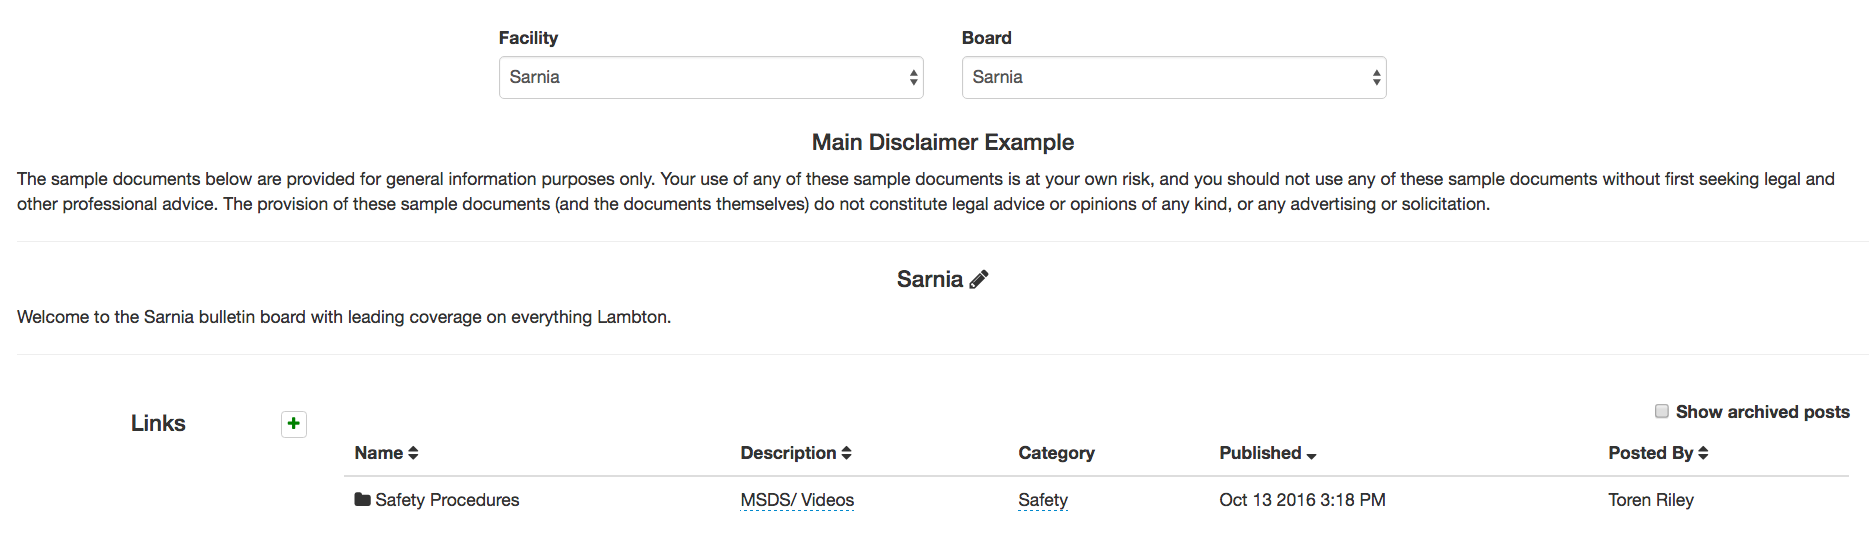
The main bulletin board begins with a disclaimer which can be edited from the admin console in the section disclaimers. The Bulletin also has a title and message below that can be changed to fit the needs of the board. When editing the message displayed by the Bulletin page the editing interface is similar to Microsoft Word.
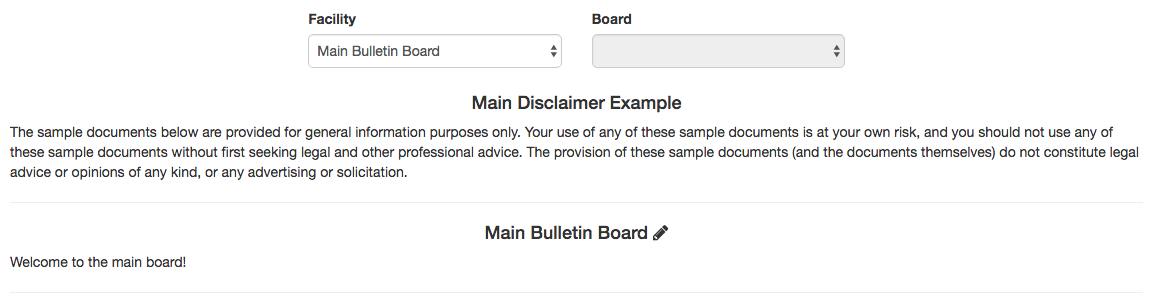
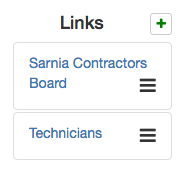
Links to webpages can be added along the left hand side. The user can even link a page to another bulletin board or another part of Shore. The user just has to define a name and type in the URL to the desired page.
Posts can be sorted by name, description, publish date, and who it was posted by. They can be sorted by ascending or descending values.

Posts can also become archived by users by right clicking on the post. They will become hidden from view in the table. However the archived posts can still be viewed by checking the box above the posts table. All the archived posts will be shown in grey.
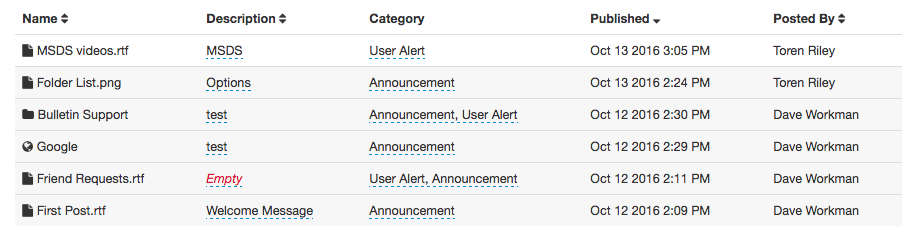
A post can be doubled left-clicked on and depending on which type of file it is different things will occur. If the post is a folder it will take the user to the files section of SHORE and straight to the location of the folder. If the post is a file it will be downloaded to the device. If it is a link to URL the user will be brought to the page.
Group Bulletin Boards #
Group bulletin boards follow the same rules that the main bulletin board does. They can be enabled for each group separately through the Admin Console in the User Groups In Admin Console section. A user with the proper permission can left click the check boxes for facility and welcome page the user can create their group a bulletin board.

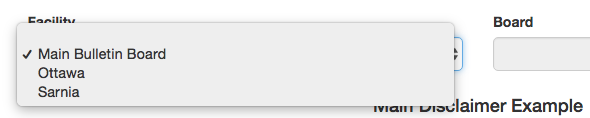
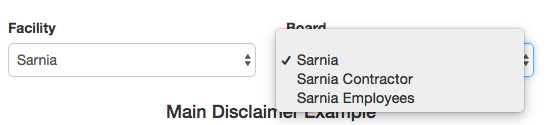
Once the page is enabled navigate back to the Bulletins tab. This will bring the user to the main bulletin board. To access the group bulletin boards bring down the drop down menu under Facility. In the board drop down menu a user can select between the facility board or subordinate boards from compound groups.
The disclaimers that are rendered on the Main bulletin board are carried over to the group bulletin board. The subordinate boards can have a separate welcome message from the Main Facility board.
Administration Console #
The administrative console can be reached by left clicking the admin tab on the nav bar.

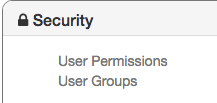
There are a couple of different administrative options to change and choose from. Each of these tabs can be expanded down to specific categories for example the Security tab has “User Properties” and “User Groups”.
Users can quickly switch between categories when in the admin console. They must left click on the slide menu near the top left corner of the page under the nav-bar.
Security #
Security allows users to be added, given access to the database, permissions to be changed, and allows users with permission to make/revise User Groups.
*On a quick Note the Security tab allows for easy switching between “User Groups” and “User Permissions” by simply left clicking this icon beside the user’s name on the left hand side.  *
*
User Permissions #
When an account is created the user requests the right to access the data and files. An administrative user has permission to deny or approve the requesting users.
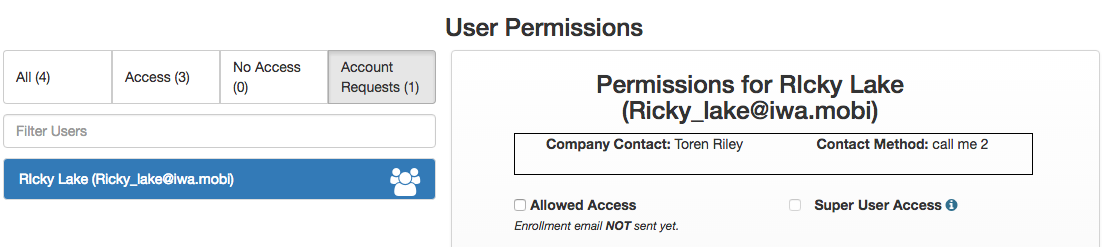
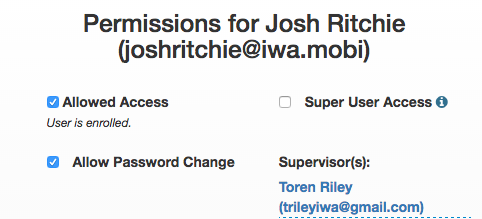
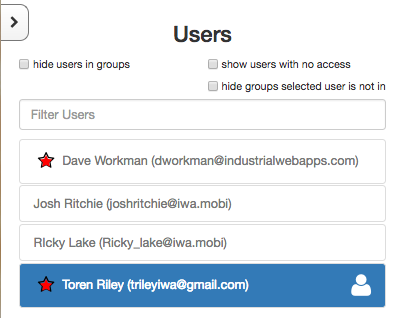
When the user is approved access to the database the administrator has the option to give the user “Super User Access”. This gives the user the power to do almost anything administrative within Shore. The users that have Super User status have a red star beside their name in the left hand side of the page.

The supervisor field can be left blank or the name of a user can be input. Usually the Supervisor is someone who knows what the new user is doing or is someone the user will be reporting to. More than one supervisor may be selected for the user to report to.
If the user is not granted super access they can be given specific modification permissions such as Approval of new users, adding/removing user groups, or viewing user activity reports.
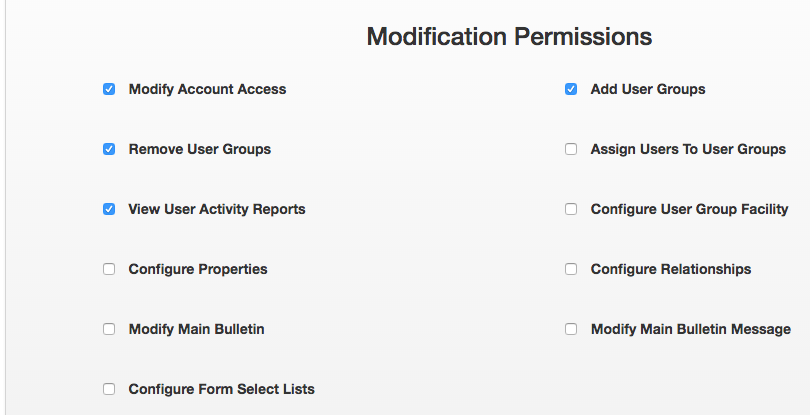
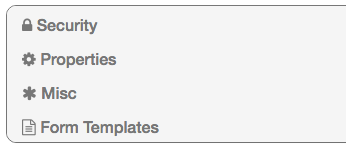
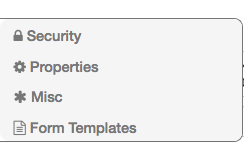
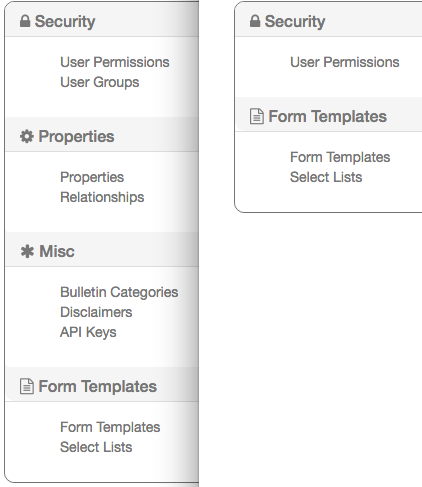
Below is the difference between Super User (Left) and regular user with no permissions(Right), in the admin console. Depending on the permissions granted to the regular user that list can be expanded to show User Groups, Properties, and Relationships as well.
User Groups #
User Groups is an easy way to sort the users into different categories. Users can be restricted to a group where they have only a certain amount of power to edit specific items or create files/folders. If they are not a Super User the user can only see items that are within the group/s that they are in or items that have not been set to a group. (Below is a picture in the Files tab)
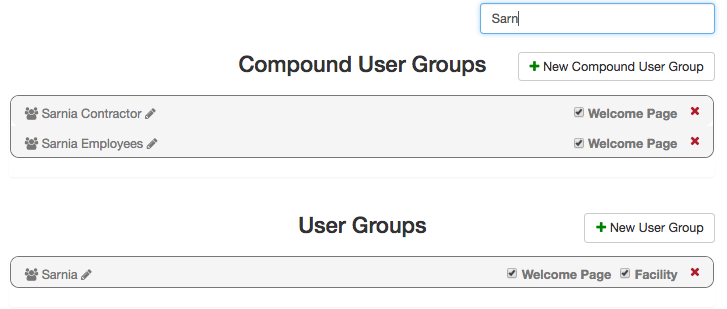
Groups can be created by left clicking on the “New User Group” or “New compound Group” buttons. Groups can also be deleted by clicking on the red “X” beside the Facility check box.
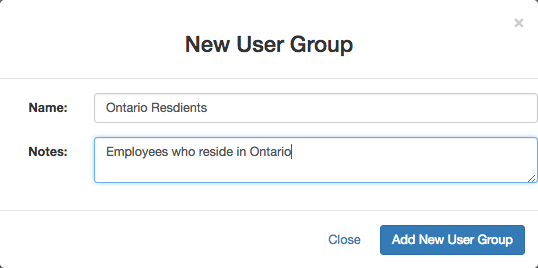
Creating a User group requires just a name and the user can write some notes about the group if desired.
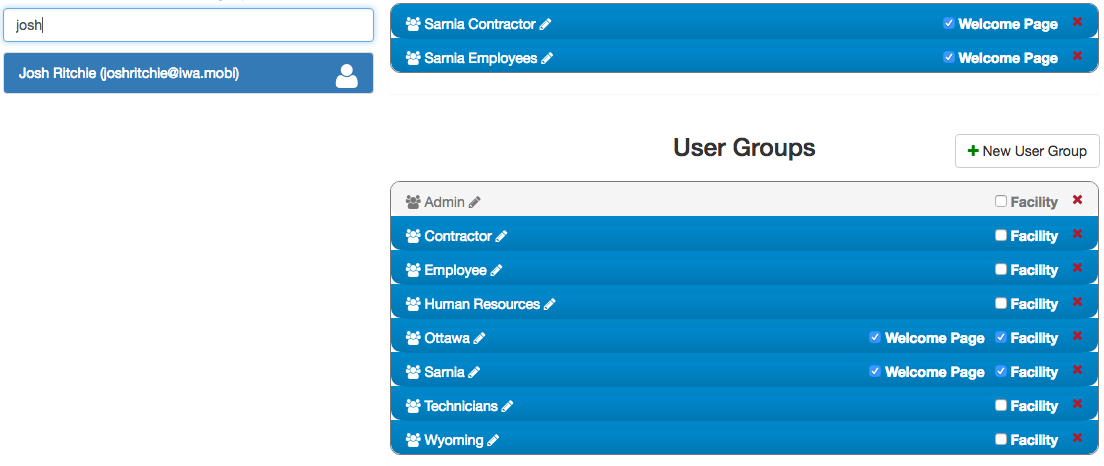
To get users into a group simply drag and drop the persons name from the list on the left hand side into the group they should be in. When the user has joined, the field will be highlighted in blue.
Groups can be filtered by using the search bar in the top right corner of the screen.
Users can be also filtered By using the search field under the “Users” title. Users in groups can be hidden by checking the box that says so. Users with no access to the database can be specifically shown. If a user is selected the other check box “hide groups selected user is not in” can be chosen to show only groups that user is in.
Compound Groups #
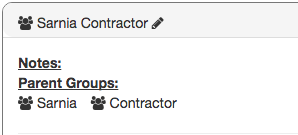
A compound group is a group that is made up of at least two different groups where the user must be a part of every group within the compound group to be eligible. To be a “Sarnia Contractor” the user must first be in the groups “Sarnia” and “Contractor”.
When the user does become eligible for the compound group by joining all groups associated with the compound group, they will be prompted to join.
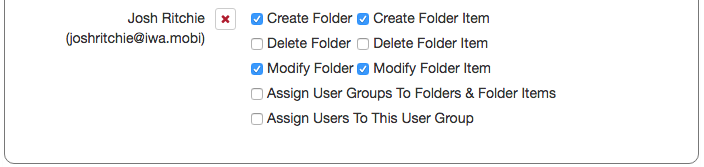
Individual Users In Groups #
Individual users can be assigned certain limitations for each group they are in.
Properties/Relationships In Admin Console #
Properties and relationships within the admin console can be customized to fit the needs of the database. If the permission is granted to the user they can create or delete.
Properties In Admin Console #
From the console the user can add, remove, or configure user properties. To add a new property just left click on the green addition button on the right hand side.
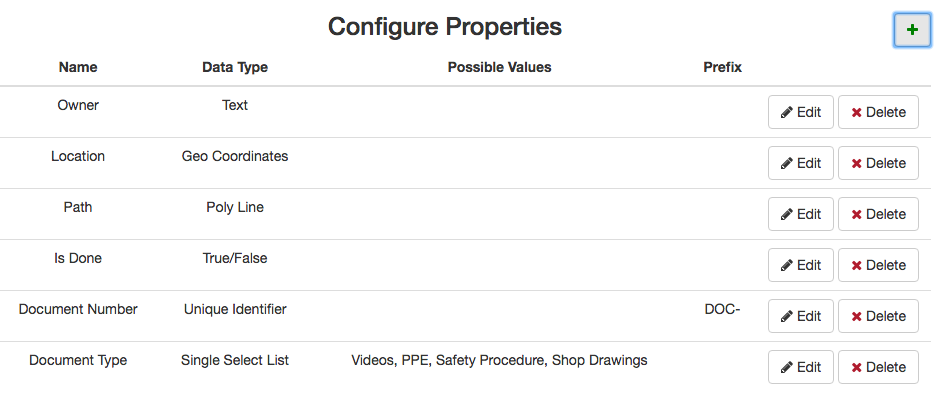
Property Data Types #
When the user adds a new property or edits an existing one they will be given the option to name it and decide what type of property it is.
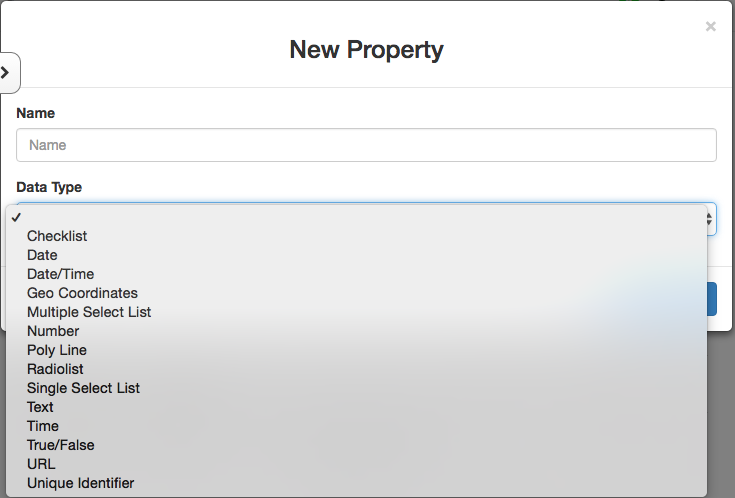
Checklist- User creates a checklist with a single or multiple items to check off.
Date- Users can select a date. (MM/DD/YYYY)
Date/Time- Users can select a date and time with a minimum of five minute increments.
Geo Coordinates- Users can select a Use my Location option, can manually enter a longitude and latitude, or can be used with Google Maps.
Multiple Select List- Used to select multiple values from a list.
Number- The user can give the object a number value.
Poly Line- The user maps out a route using waypoints on a map.
Radio List- Radio buttons allows the user to select ONE of the values amongst a limited field.
Single Select List- Used to select a single type of value from a list.
Text- User can write any text in the field.
Time- Can add a time stamp with a minimum of five minute increments.
True/False- True or False options only.
Unique Identifier- User can set a suffix that is followed by a number that increments by one every time a new object has the unique identifier property added to it.
URL- Allows the user to tag entry as a webpage.
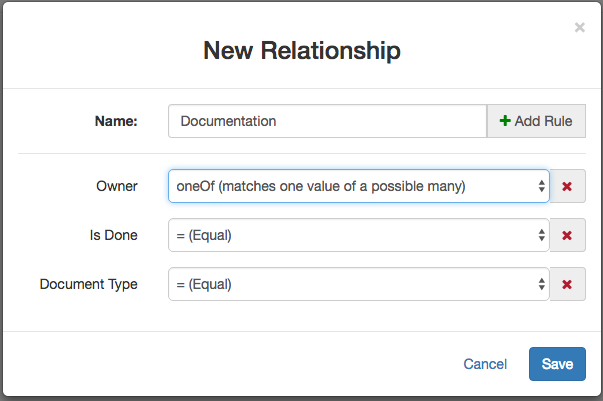
Relationships In Admin Console #
Relationships are directly affected by the properties within the database. If the database has no properties the user cannot create a relationship.
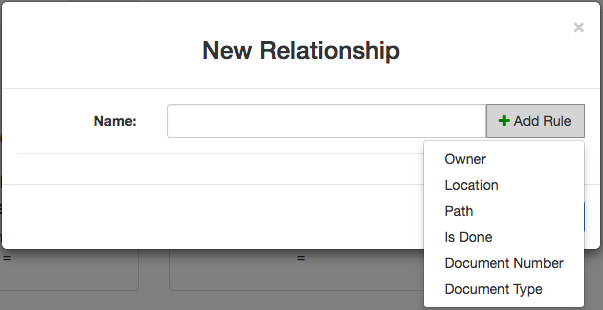
Relationships can have multiple properties (rules) to make any sort of connection desired by the user. The rules are displayed below the name of the relationship they can be set to be an equal match or to match a variety of different options.
Misc. Admin Console #
Bulletin Categories #
Bulletin categories allows the user to add, remove, or change categories for the bulletins posted on the board. The user just has to left-click on the green addition symbol and type the name they choose.
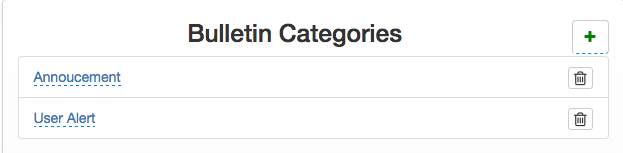
By default on the bulletin board a category is not chosen on a post. The user decides on a category respectively by left-clicking on the category section beside the name of the post.
Disclaimers #
Disclaimers are statements that deny certain things most likely responsibility. Shore allows the user to write a disclaimer for three different locations.
Bulletin disclaimer
Sign up Disclaimer
Footer Disclaimer

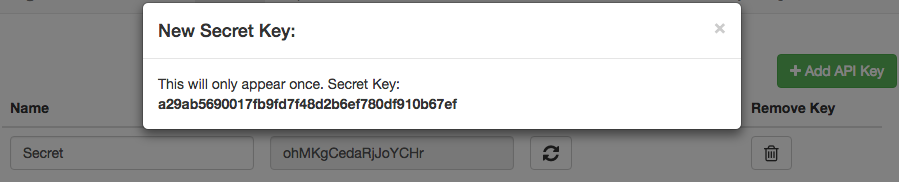
API Keys #
An API Key (Application Programming Interface Key) is a code passed on by computer programs calling an API (Application Programming Interface) to identify the calling program, its developer, or its user to the web site. API keys are used to track how the database is used and to make sure that abuse of the page does not occur.
To add a new API key just left click the add API Key button. All the user has to do is name the API key and the rest will be generated for them. The secret key is only shown once but can be regenerated to create a new secret key.
Form Templates In Admin Console #
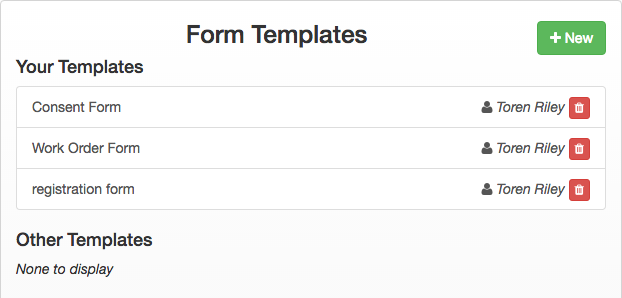
Form Templates #
Form Templates allows users to upload or view a variety of Spreadsheet based form templates. Forms are sorted by forms uploaded by the user and forms updated by another user. Forms can also be edited in the Form Builder.
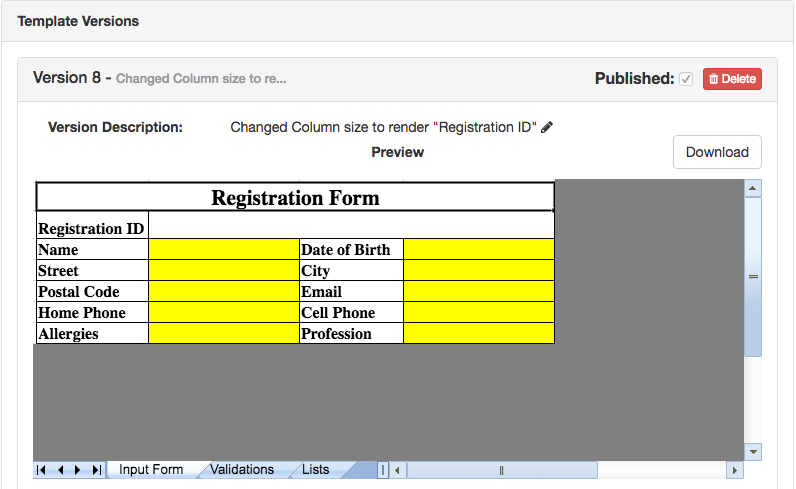
Once a form template has been uploaded the user can see a variety of information about the form. The form viewer shows:
- A preview of the form
- The version number of the form
- whether the form is published or not
- Who created it
- The date it was created
- Shows the data tags used in the form
- Any lists within the form
- Any references to other parent or child forms
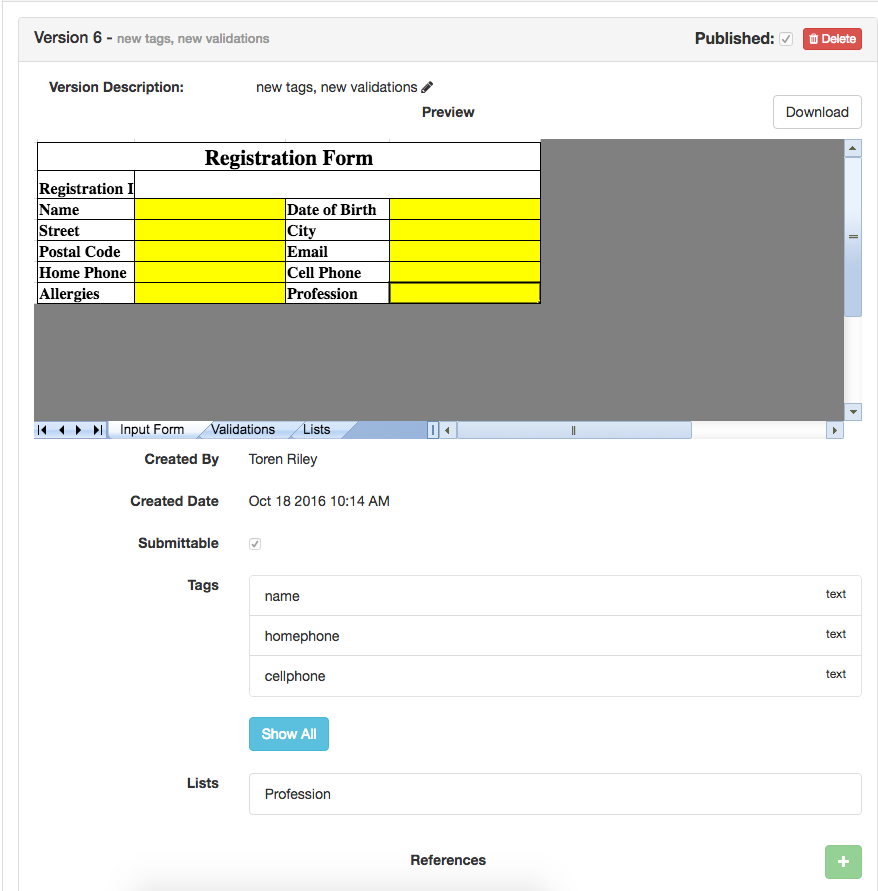
Any version of the form can be viewed, deleted, or downloaded locally.
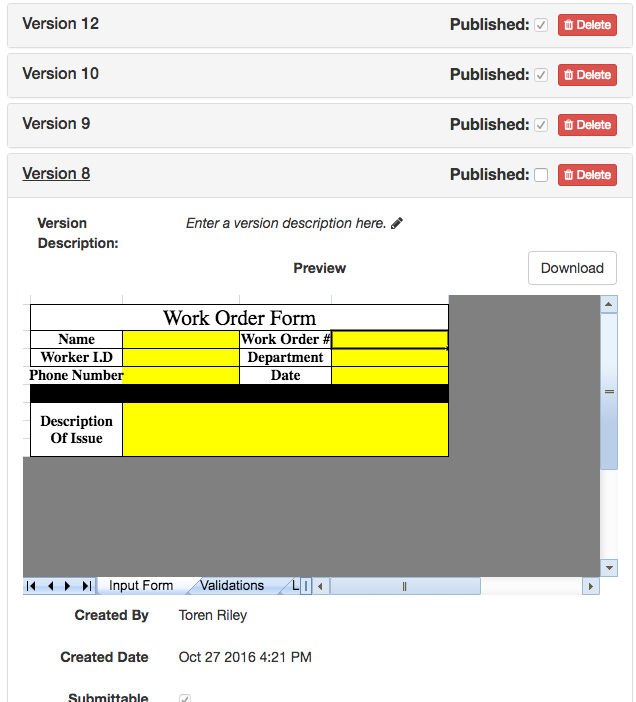
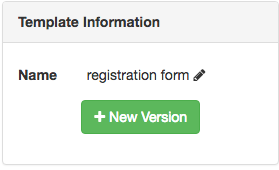
New Versions of the form can be uploaded outside of Shore from the left hand side of the page.
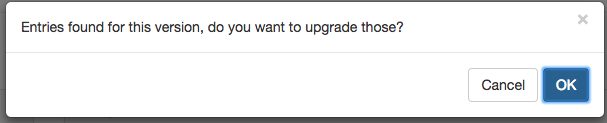
Upgrading A Form #
When an old version of the form is being deleted the user will be prompted to upgrade the forms from that version to the newer version.
The form upgrader allows the user to remove or rename tags that no longer appear in the new version. Also gives user what tags have been added since that form.
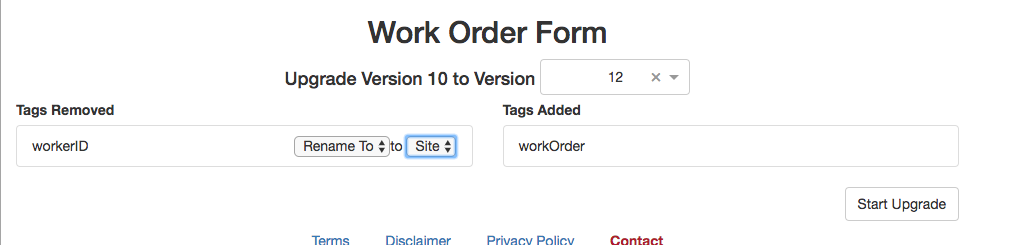
The user can choose to upgrade only one version of a form to another. The user can also choose a specific repository to upgrade rather then upgrading all versions of that form in every repository.

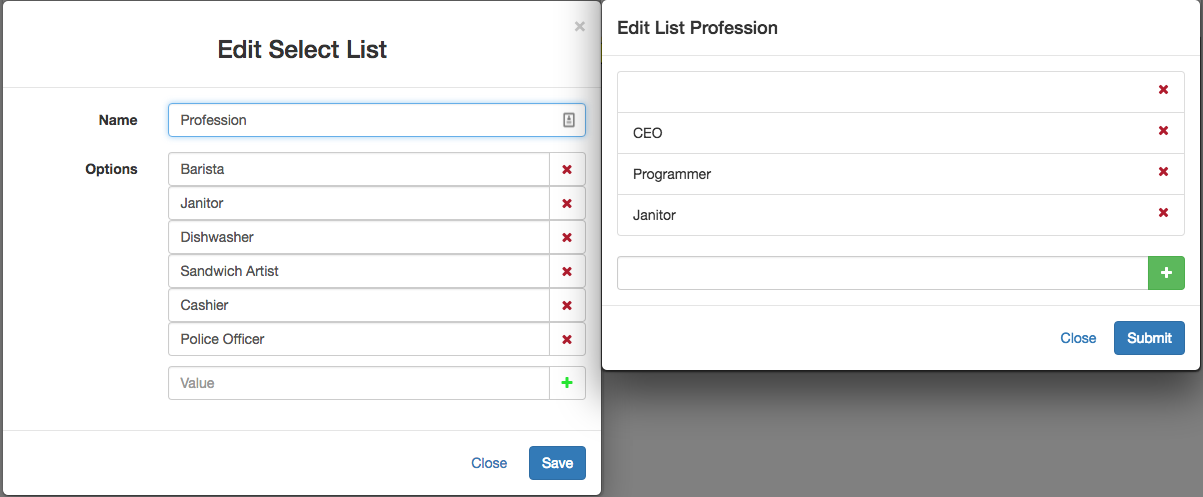
Select Lists #
Select lists are the same as the lists that are personalized in a form. Selects lists do take precedent over the lists defined within forms. The name of the select list has to be the same as the tag name for it to be recognized.

The two lists below show the differences between them. The select list formatted within the admin console while the other list was formatted in the form itself.
Reports #
Reports is the final tab along the top bar and can be accessed like the others by left clicking on the tab.

The report tab has two options in it one is “User Activity” and “Form Entries”.
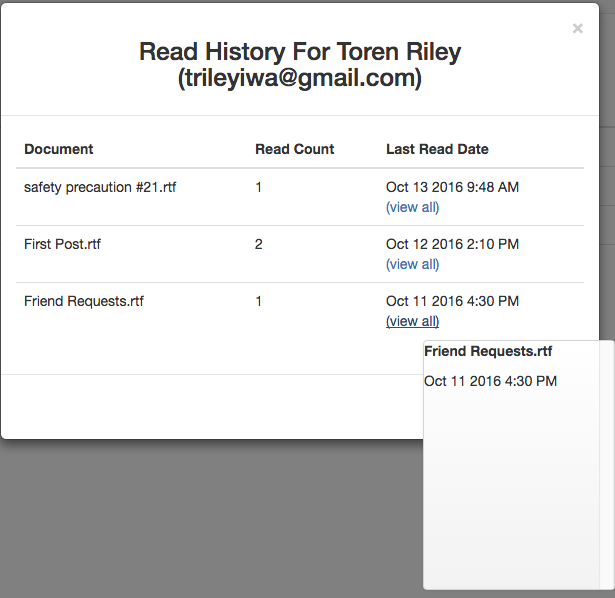
User Activity #
User Activity allows users with the permission to see information about other users usage on the database. The user can see when other users were last active, if they are allowed access to the database, and history on the files they read.

By left clicking on the button below the Read History column the user can see the last files the user has looked at, when the user last read them, and how many times they have read that file. Files with two or more Read Counts will show a time and date for each time the file was read.
Form Entries #
Form Entries allows users with access to review the forms completed by users. The search does not have to be limited to one repository or to one form. If more than one type of form is selected users can only select tags that all the forms have in common.

Users can add as many filters for tags as they want. This allows the user to create a unique relationship between forms and/or repositories.

Each tag added can have different validations to return different search results.
Between- Users can choose between two dates or two numbers.
Does Not Equal- The character(s) searched for will be excluded from results.
Equals- Make the character(s) that are searched for return the exact same thing.
Filled Out- Will return any form that has the specific field filled out.
Greater Than- Users select a date or integer that the field is greater than.
Less Than- Users select a date or integer that the field is less than.
Not Filled Out- Will return any form that has the specific field left blank.
Time Ago- Lets users specify how much time has passed since current date and data field.
Time Ahead- Lets users specify a date from the future that a form regards to.
Ends With- Can find a field that ends with a specific character.
Starts With- Can find a field that begins with a specific character.
Contains- Users can specify if the form field contains a certain character.
Does Not Contain- Users can specify if the form field does not contain a certain character.

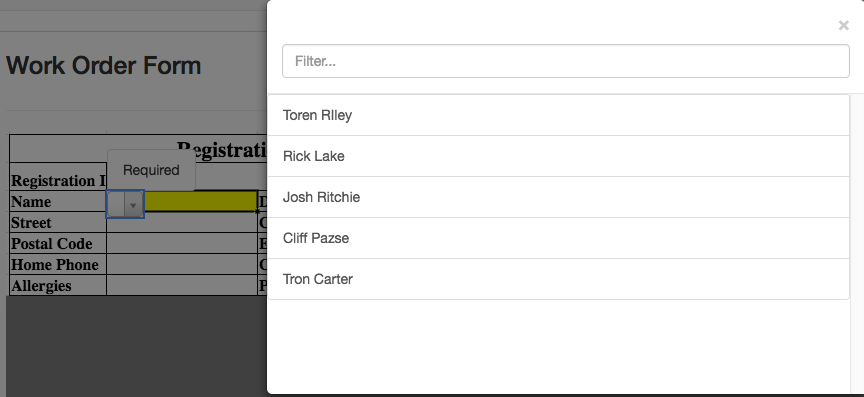
The user can select what information is returned in the search below and how it is sorted. The user can have as many tags as the form has. Each tag section can be dragged and dropped above or below the others. To drag and drop hold down the left mouse button overtop of the  button.
This allows the users to decide in what order the tag information in the form previewer is returned.
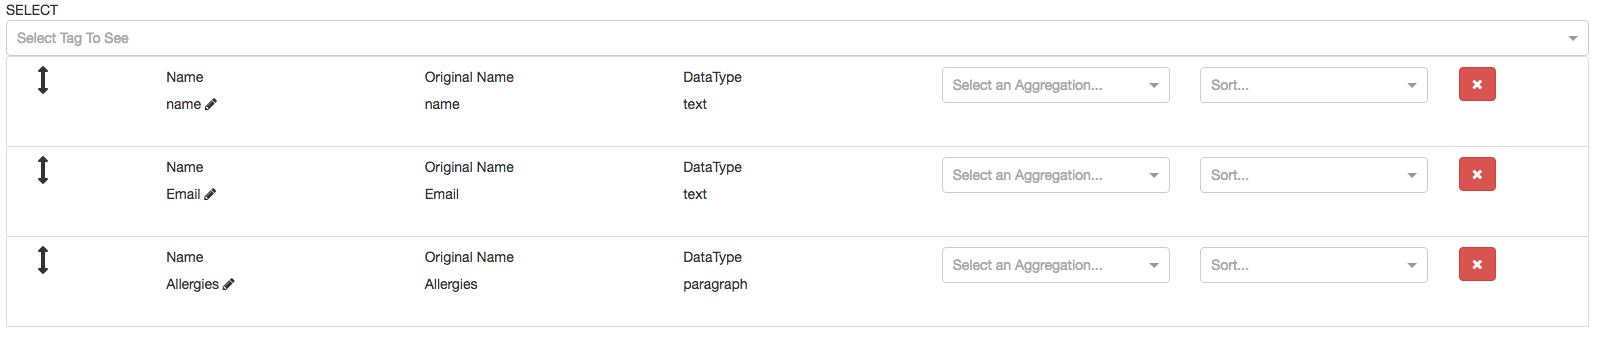
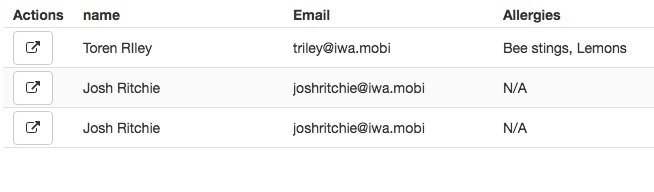
In the examples above and below the “name” tag was returned first followed by “Email” and than finally ended by “Allergies”.
**To quickly access a form that is returned in the search, left click on the Access to Form icon.**

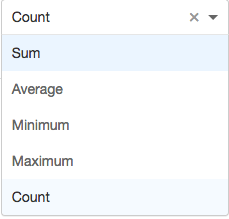
A user can also use the Aggregation drop down menu from the tag select section. (Sum and Average work with non-text tag fields the best)
Sum- Adds together all the fields for that tag returned in the search and sums them.
Average- Adds all the fields for the tag and divides them by how many were added together.
Minimum- Tells users the minimum amount for the field from the tags searched. When used with a date is uses the date most recent to the present time.
Maximum- Tells users the maximum amount for the field from the tags searched. When used with a date it uses the date from the farthest away date from present time.
Count- Takes all the results for the tag in the search and adds up how many there is.
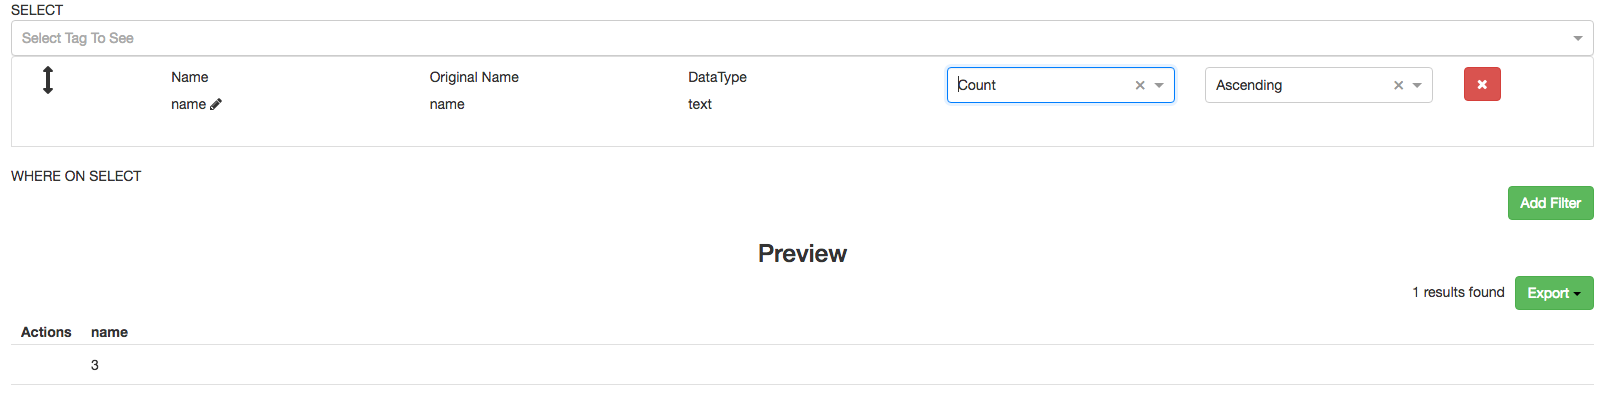
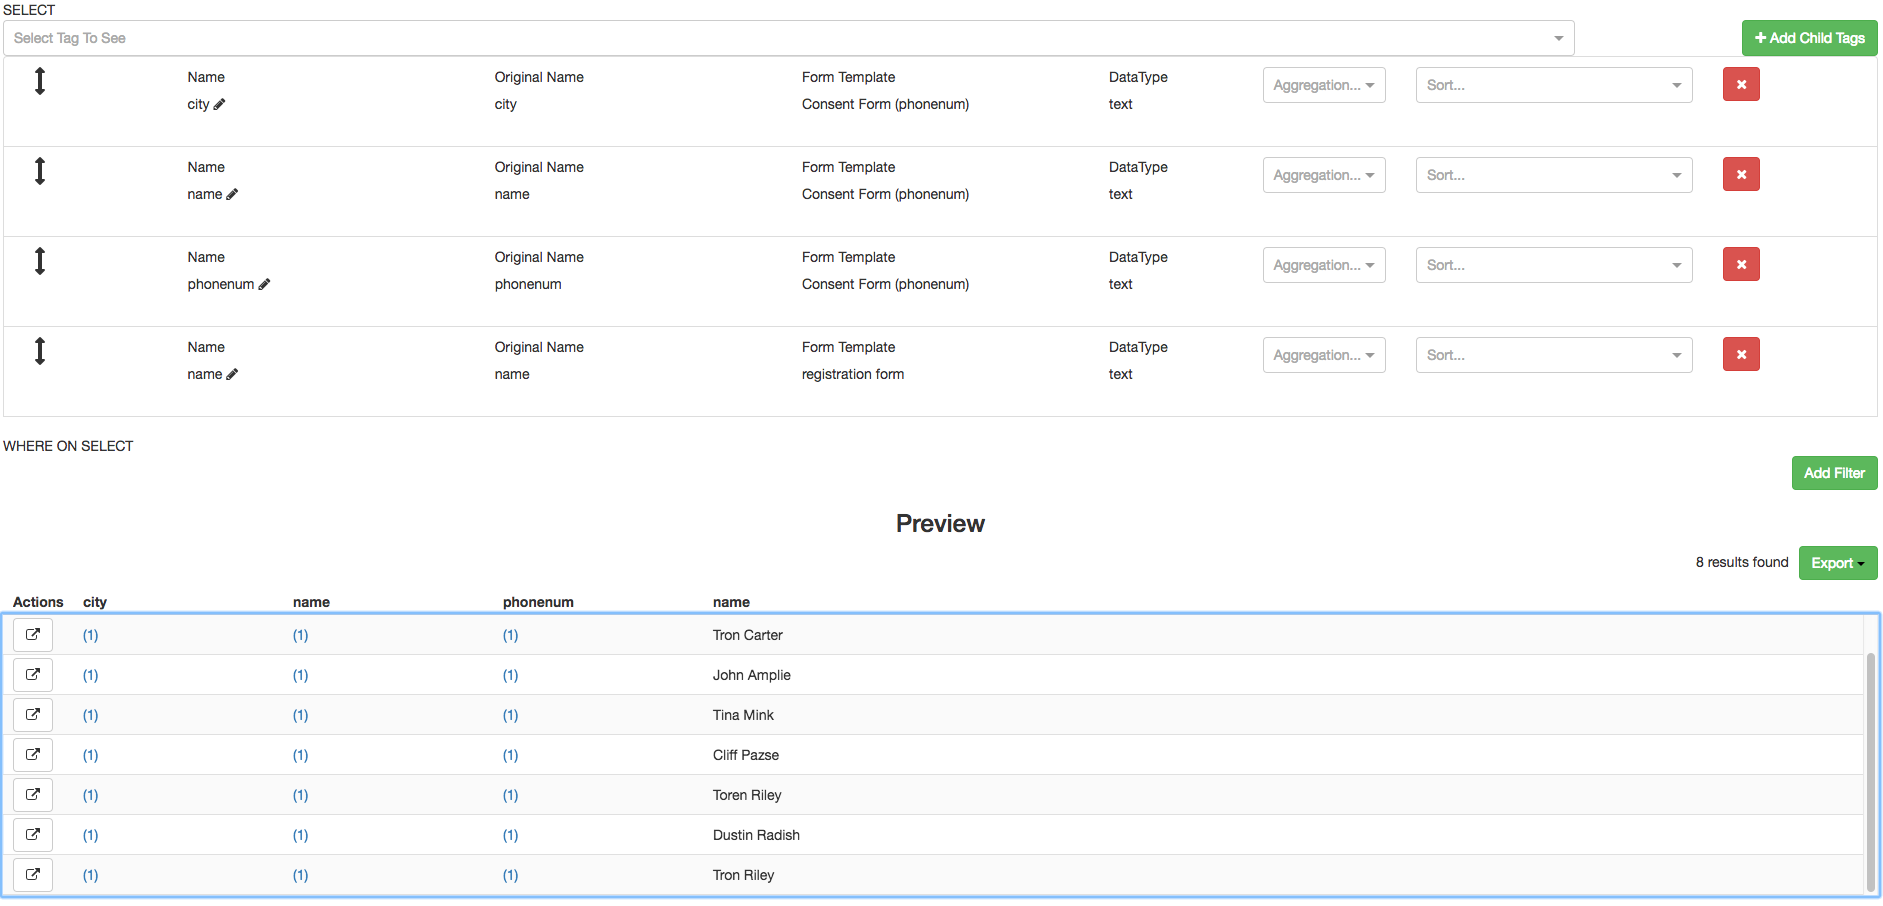
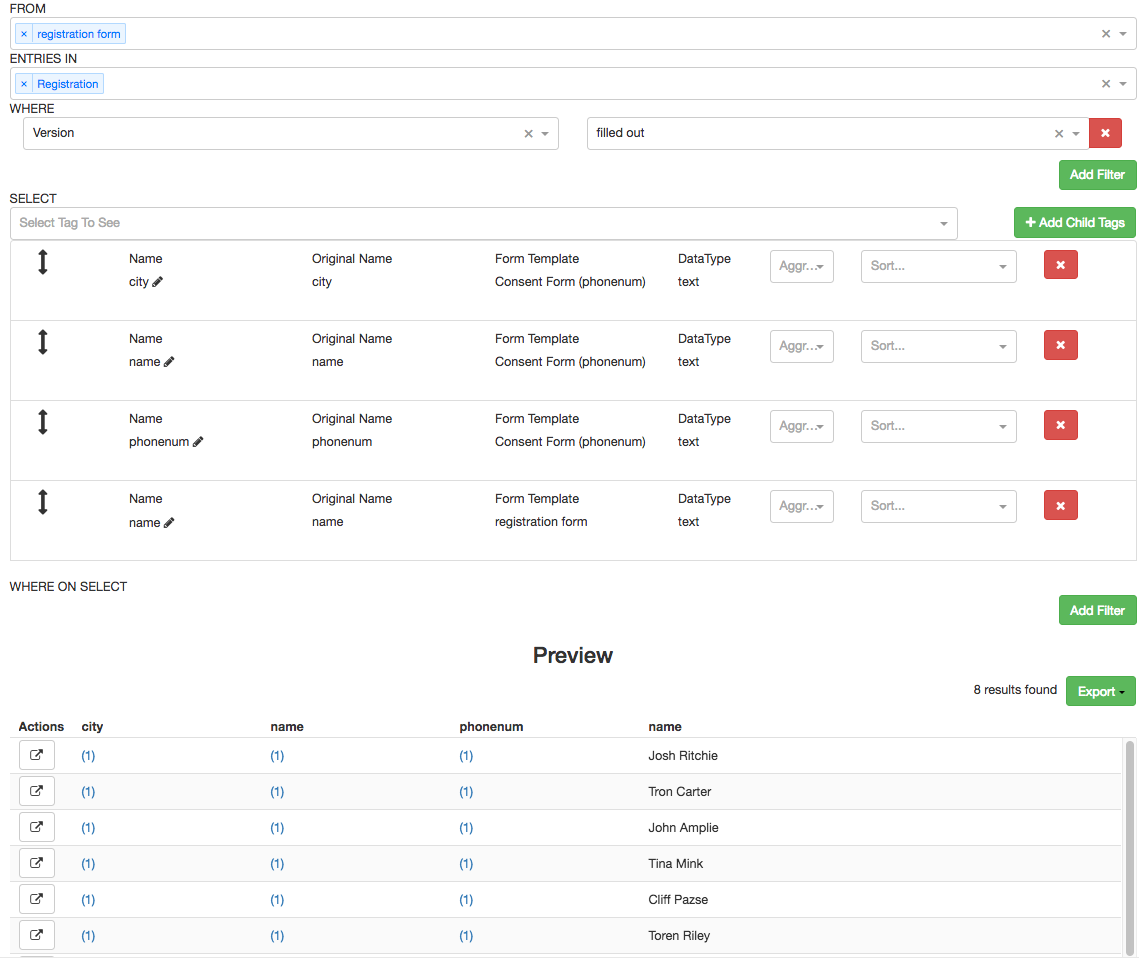
Users can select child reference tags to return in the form preview section. This can only be done if a form within the database has a child reference attached to it. Follow the link if more information on child references is needed.
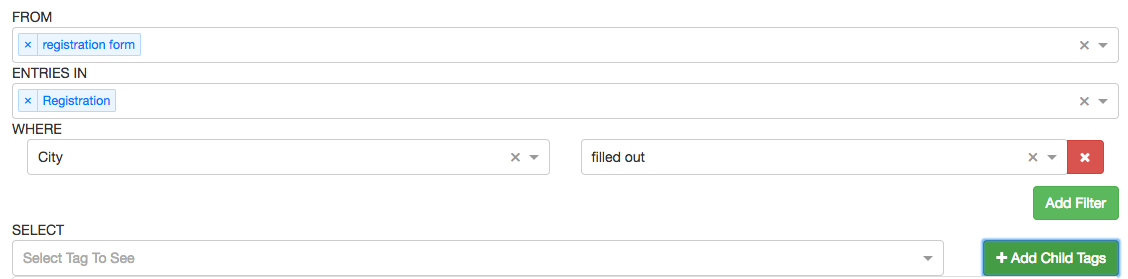
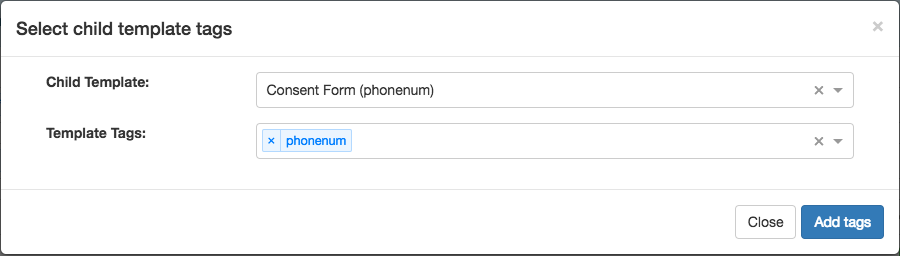
To add the child reference just left click on the “Add Child Tags” button. The user then chooses the field that retains to the child reference they would like to be returned in the previewer.
The preview shows the child references tags in blue. Users can see all the names, home phone numbers, and cell phone numbers from the “consent form” that had the same home phone number as someone from the “registration form”.
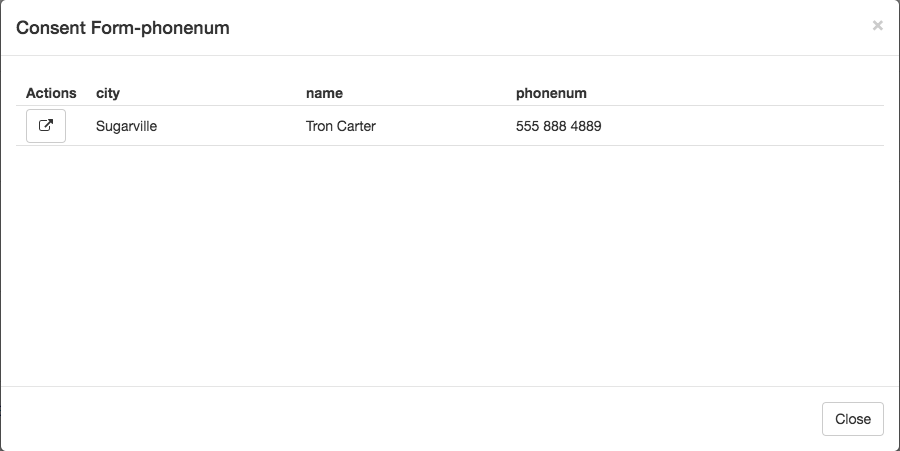
When the user left clicks upon the child references, it opens a new window with information regarding the separate entries. The forms that these references occur in can be accessed by left clicking the on button underneath the “Actions” section of the new window.
The results returned by the entry reporter can be exported as:
1) An Excel file - The Excel file shows the information selected in the tags. Any child reference information will not be shown in here. However if a tag is defined as the exact same name as a child reference tag in the report it will return that data. Any date formats will change to YY-MM-DD once imported into Excel.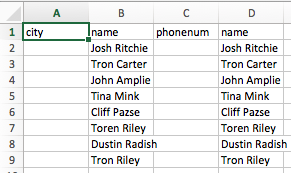
2) Opened as a new tab in the browser - Opens a new tab for easier viewing of the preview.
3) Viewed in a DOCX file template - Allows user to create a DOC X template file to return whatever data they require in a specific way.
DOCX Template Building #
The DOCX data view requires the users to have a template for the information to be rendered. Users can create their own DOCX file to return data in their own customizable way. The user could use MS Word or another DOCX editing software.
Syntax used in the Doc X template builder is inspired by Mustache. Users add {#results} at the top of the document and at the end of the document the user will add {/results}. This creates an opening and closing loop for the data. Users will also use the curly braces when they need to reference data from a form on the database. Example below is “name” right under the “results” opening loop. The “name” tag is referenced from the Registration Form in the Registration repository.
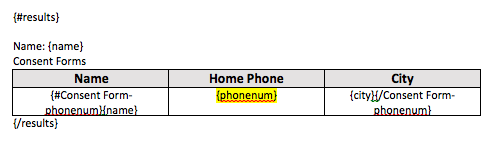
The Doc X forms can also return data from a child reference. The user must start another opening loop with the name of the form and the child reference in curly braces EX. {#Consent Form-phonenum}. This will be followed by the tag the user wants to return from the form. Ex [name].

In the Shore application if the correct tags are not selected they will not return any data. for example if the child reference from the Consent Form “phonenum” was in the Doc X template but not selected as a tag in Shore then the data will return undefined.


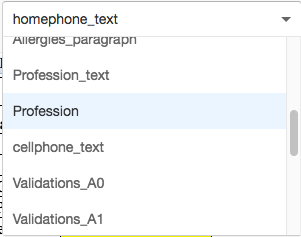
Formatting in the document can be passed on such as font type, font size, text colour, and alignment. For example “homephone” in the picture below has had its text highlighted in Yellow.

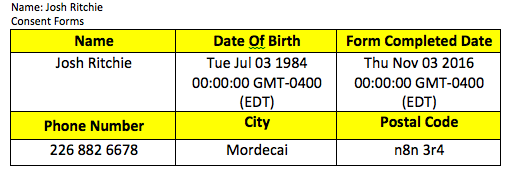
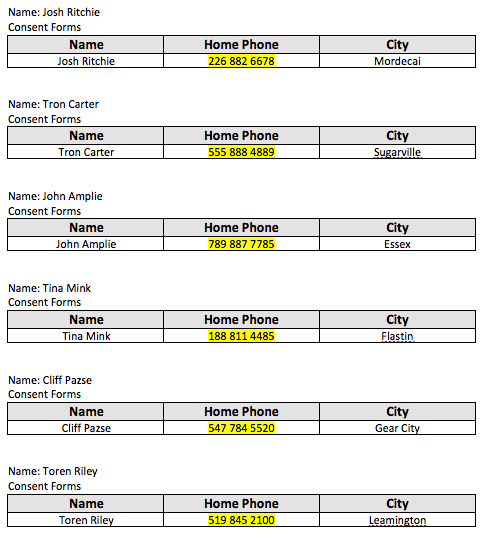
This is an example of the information selected in Shore and returned in a DOCX form using that data. It shows the name of the user from the registration form just above the table. The Consent Form has the tags name, home phone number, and city returned.
Form Builder #
The Form Builder is where users can edit forms templates for the database. Fields, tags, lists, and validations can be modified to fit the needs of forms that change over time.
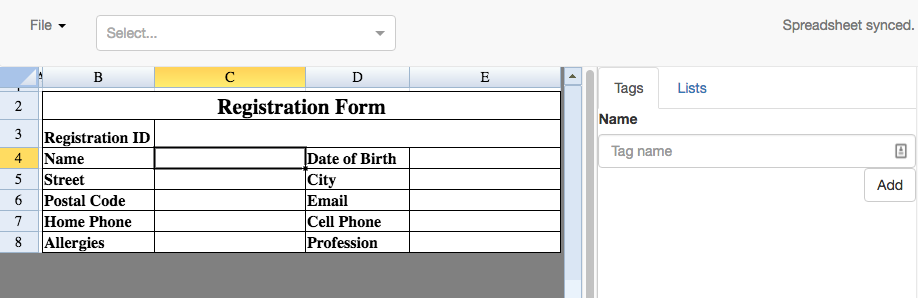
To add a new tag just simply by left clicking on the field such as the empty space beside “Name”. In the right hand panel type in a tag name and hit add. This is where users can edit the tags, validations, display type, and create lists within the form.
When entering the name for the new tag certain rules apply so that the name is valid.
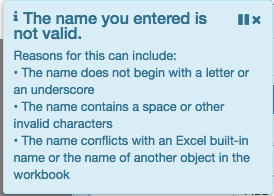
**For more on what are the different types of data types and validations check in the form repositories section.**
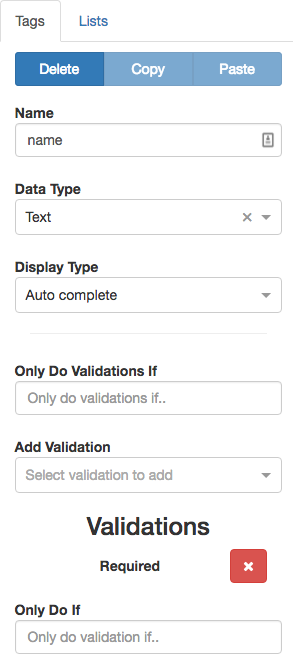
Validations can be used to make sure the data provided by users is actually relevant to the field it retains to. Calculations are done behind the scenes to determine whether the field was completed right or not. Validations can be deleted, copied, or pasted to a new cell using the buttons near the top.
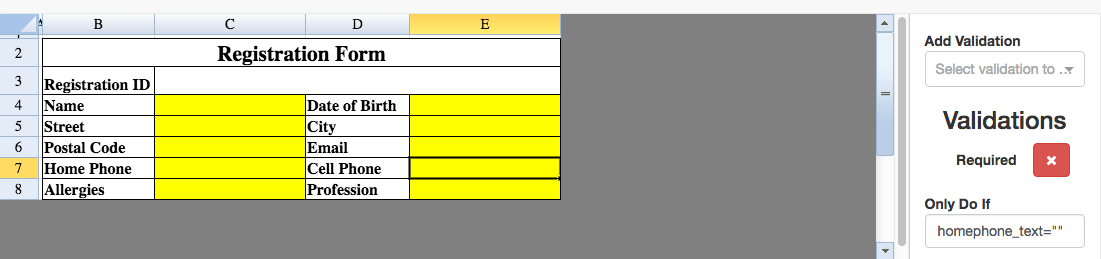
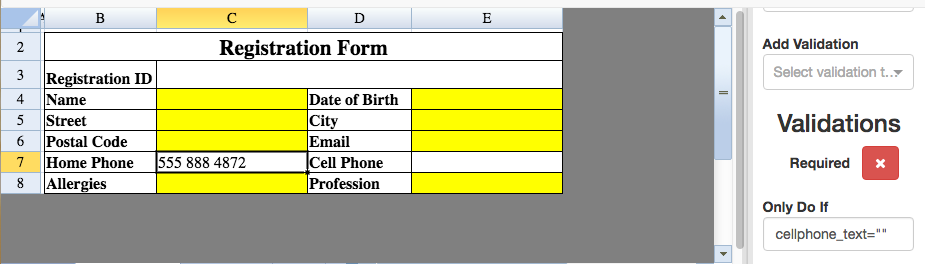
For example, in the form both “Home Phone” and “Cell Phone” are required validations but they are set to only be required if the other is blank.
**Remember any form that has a required validation will appear in a different colour (yellow) unless it is completed.**
Validations have an option to only execute the validation if certain conditions are met. This can be a custom formula or something like shown below where “home phone” and “cell phone” have the “required” validation but if one of them has been filled out then the other is optional to fill out.
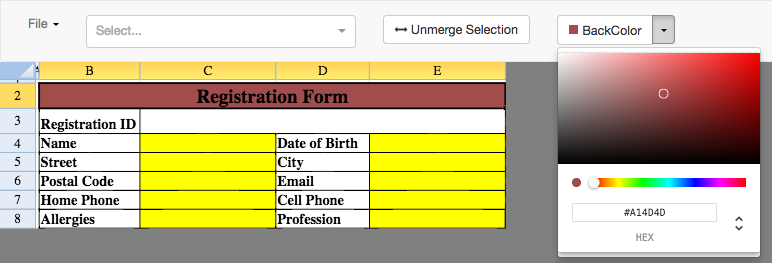
Each cell can have the background colour changed by left-clicking the “BackColor” button at the top of the form builder then left-clicking and dragging the crosshairs to the desired colour and shade.
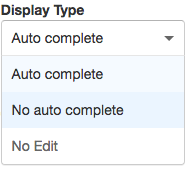
The display type allows users to decide whether the tag field is changeable or whether or not the field has the possibility to auto complete.
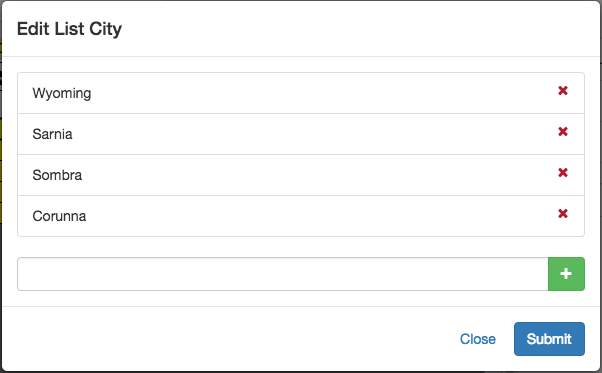
To create a list left click on the tab beside “Tags” in the right panel and type in the name that matches the Tag the user wants the list to relate to.
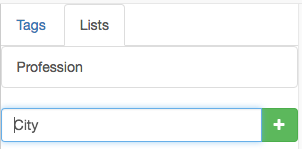
Once the list is made just left click on the name of the list. The user can then add all the options in the list they want.
On the top left hand side of the form builder page users can access a drop down menu that has a list of the tags and validations in the form. Tags and validations chosen will appear in the right hand panel.
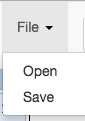
Once the form has been updated the user can open the file menu in the top left corner and select the save option. Users can write a note about the version of the form they just completed.

The same form can also be reopened without saving to undo any changes that the user may have made. The user can also open up a different existing form to modify without leaving the form builder.
Navigate back to the admin console and select the form templates option. Choose the form that was just edited to see a preview of it. The user can now publish the form to the database by checking the box beside the delete button.
Parent And Child References #
Parent and child references are where users can get forms or files to relate and read data inputted from other forms. Users can only add references to forms that have not been published yet. To access and add a new reference the user will have to go to the form template section of the admin panel. Select the form from the list of templates. Part way down the page is the references section of the template. Left click the green addition sign beside to add a new reference.
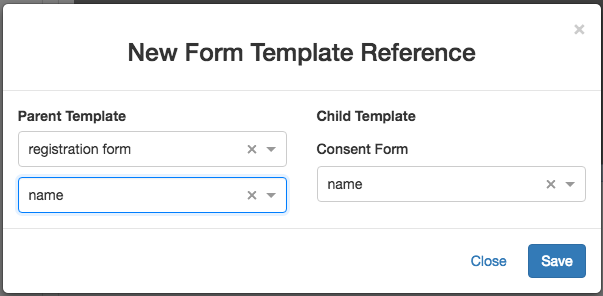
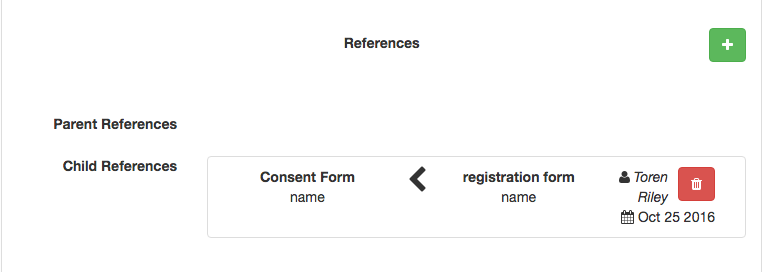
The parent reference has the information that gets passed down to the child reference. The parent reference in the case below is the registration form tag field “name” while the child reference is the Consent form tag field “name”.
When Consent form is being filled out the “name” field will contain a list with all the names used in the registration form “name” field. Users are restricted to any name that is on the list. If a new registration form is created with a new name then that name will be updated and added to the list.